Metallographic Sample Preparation: The Complete Technical Guide for 2026
Metallographic Sample Preparation: The Complete Technical Guide for 2026
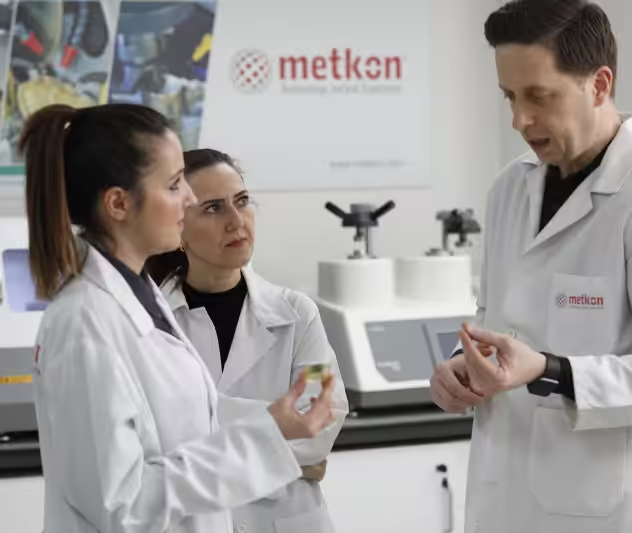
Metallographic sample preparation is the backbone of microstructure examinations and quality assessments in the field of material science. The quality of each step in the metallographic process is a key factor in how clearly you can ‘see’ the true composition of the metal you’re working with. This article will take you through the entire metallographic examination process from cutting and mounting samples through grinding and polishing, and beyond! It will also explain why metallographic sectioning is a crucial step, how you select the appropriate equipment for the task, and the ASTM specifications governing the metallographic specimen preparation needed for reliable and consistent results in 2026.
Understanding Metallographic Sample Preparation: What It Is and Why It Matters
Metallography is the science of revealing and studying the internal composition of a material. It is a vital tool for material scientists and engineers working with metals and alloys. It enables the interpretation of the material properties through the examination of the microstructure.
While the term ‘metallography’ was coined with metals and alloys in mind, the field has evolved beyond the traditional metals and alloys. Today’s industrial materials include advanced alloys, ceramics, composites, and plastics. Metallographic sample preparation is a fundamental tool for material characterization.
What is Metallographic Sample Preparation Used For Today?
While metallography was born with metals and alloys, today’s industrial materials include advanced alloys, ceramics, composites, and plastics. Metallographic sample preparation is a fundamental tool for material characterization.
What is Metallography and Microstructure Analysis
There is a variety of analytical tools employed during metallographic sample preparation. Optical microscopy is a fundamental tool with a resolution range of 50x to 1000x. Scanning Electron Microscopy (SEM) is another tool with a higher resolution than optical microscopy. Energy Dispersive X-ray Spectroscopy (EDS) is employed with SEM for the identification of the composition at a specific point. X-ray Diffraction (XRD) is also employed for the identification of the crystal structure.
Key Applications in Modern Industry
Advanced materials play a significant role in the aerospace industry, automotive industry, electronics industry, and the energy industry. Metallographic sample preparation is employed wherever material reliability is a factor. Aerospace components require the examination of the grain structure and the validation of the heat treatment processes. The automotive industry requires the validation of the welding processes and the adhesion properties of the coatings. Electronics manufacturers employ metallography for the validation of solder joints and thin film uniformity.
Quality Control and Failure Analysis BenefitsMetallographic preparation results in four major industry benefits: information about grain, phase, and precipitate content, optimization of heat treatment, forging, casting, and other processes, and finally, in case of unexpected failures in components, fatigue, corrosion, or processing defects, which can all be analyzed using metallographic data.
The Complete Metallography Workflow Overview
This is referred to by professionals as the “Total Preparation Solution,” a situation where the right equipment, method, and consumables combine to deliver a perfect result. The steps in sequence involve:
Cutting: This is where you gain access to the area of interest, all while avoiding too much heat and deformation.
Mounting: This is where you embed samples that are too small or difficult in shape in resin for easier handling, using hot or cold mounting depending on the sensitivity of the specimen.
Grinding and Polishing: This is where you remove scratches and other imperfections to give a clean surface that is ready for analysis, using progressively finer abrasives and polishing suspensions containing diamond.
Etching: This is where you use a chemical or electrochemical etching method to reveal grain and phase content using special etching chemicals.
These steps all combine to give you a final result, and any mistakes in any of the steps can result in a final product that does not give you a true picture of the specimen.
Metallographic Cutting: The First Critical Step
The cutting step is the beginning of the metallographic preparation, and it sets the tone for all that follows. The cutting method determines the performance of all the steps that follow, and it determines the amount of damage that you will have to endure in the process.
Why Sectioning Matters
Clean and precise cuts reduce subsurface damage and preserve secondary features such as the presence of graphite, nodules, or grain pull-out. Heat generated during cutting can damage the surface and slow down the cutting process. Precise sectioning helps to reduce cutting time and reveal the real structure of the material.
Abrasive Cutting for Metals
Abrasive cutting is the principal technique used for ductile materials. Silicon Carbide (SiC) or alumina (Al2O3) is used, which are bonded in resin or resin rubber. The abrasive, bond, and properties of the material are used to determine the abrasive blade used.
SiC with a hardness of about 2500 HV is used for cutting non-ferrous metals, while alumina with a hardness of about 2000 HV is used for cutting ferrous metals and general-purpose cutting. The hardness of the bond is also important, with hard bond wheels used for cutting soft materials and soft bond wheels used for cutting hard materials.
Precision Wafer Cutting for Delicate Materials
Thin diamond blades are used for cutting precise sections of ceramics, minerals, and sensitive metals. These blades have a hardness of about 8000 HV. Cubic boron nitride blades are used to efficiently cut hardened ferrous materials and have a hardness of about 6000 HV.
The cutting parameters used are dependent on the material. For diamond cutting, the parameters are usually between 50 rpm and 4000 rpm, and the loads are between 10 g and 1000 g. Harder materials require higher loads and speeds, while brittle substrates such as silicon need to be handled more carefully to avoid cracking.
Choosing the Right Cut-Off Wheel
Select the right wheel to avoid burn and distortion, which helps to reduce cutting time and wheel consumption. Select the abrasive wheel that is best suited to the material to be cut. For example, SiC is used to cut non-ferrous metals, alumina is used to cut ferrous metals, and diamond is used to cut ceramics and glass. Cubic boron nitride is used to cut hardened ferrous metals.
Cutting Machine Options
Equipment selection depends on the material and precision requirements. For abrasive cutting, SiC and Al2O3 wheels are used. For precision cutting, thin diamond and CBN blades are used. For better results, the cutting speeds and loading conditions should be consistent.
Cutting and sectioning methods
| Method | Best for | Key controls | Advantages | Typical risks / artifacts |
| Wet abrasive cut-off (abrasive cutting) | Most metals; routine sampling | Wheel selection, clamp stability, coolant flow, feed/force | Low structural impact vs rough sawing; widely used in industry | Heat-affected artifacts if cooling is inadequate; deformation requiring longer grinding |
| Precision wafering (thin diamond blade) | Ceramics, minerals, delicate or small parts; electronics substrates | Blade condition/dressing, speed & load, coolant type | Minimizes chipping and damage on brittle materials | Blade loading/smearing for some metals if lubrication is wrong; fracture at end-of-cut if loads are not managed |
| Band saw / low-cost sawing | Oversized parts where surface quality is non-critical | Mechanical stability; subsequent stock removal plan | Low cost, fast rough separation | High deformation/rough surface; increased grinding time |
| Microcut | Polymers & very soft metals (thin sections) | Cutting geometry; temperature control | Enables very thin sectioning | Limited applicability; not a general metallography tool for hard metals |
Best Practices to Prevent Heat Damage
Ensure the specimen is firmly attached to the equipment. Use a blade at operating speeds and apply constant and consistent pressure. This helps prevent overheating and excessive equipment damage. The use of lubricants helps in cooling and cleaning. The lubricants used should have high flash points. For cutting wafers made of metal materials, oil-based lubricants can be used. For materials like ceramic and composites, water-based lubricants can be used for cleaning.
Mounting Methods in MetallographyMounting of materials after cutting helps in grinding and polishing. This helps in obtaining consistent results with equipment.
Hot Mounting: Process and ApplicationsThis method involves using heat and pressure to encapsulate materials. In this method, the major processes occur during the heating and cooling phases. This method is quick and helps in encapsulation.
Resin Choices and Key Properties
Five types of resin materials meet the requirements of users. Phenolic resin, acrylic resin, epoxy resin with glass fillers, diallyl phthalate resin, and conductive resin meet the requirements of users. For electron microscopy, conductive resin materials are used. Three factors influence resin selection. First, resin selection depends on the hardness of the materials. This helps in preventing damage during grinding. Second, resin selection depends on shrinkage. This helps in preventing gaps between the materials and the resin. Third, resin selection depends on viscosity. This helps in encapsulating materials in corners. For tight spots, materials with low viscosity should be used.
Cold Mounting for Heat-Sensitive Samples
This method involves using room-temperature curing polymers. This method is used for materials sensitive to heat.
Mounting Method Decision Guide
Hot mounting works well for standard metal, ceramic, and mineral materials. For this method, the turnaround time is quick. On the other hand, cold mounting suits heat-sensitive materials and assemblies with coatings, varying thermal properties, and delaminations.
Mounting methods
| Mounting approach | When to use | Why it works | Key pitfalls to manage |
| Hot mounting (compression) | Routine work; when heat/pressure won’t alter the specimen | Fast, robust mounts; supports standardized holders | Resin shrinkage/gaps reduce edge protection; avoid choices that mismatch hardness vs specimen |
| Cold mounting (castable) | Heat/pressure sensitive samples (coatings, PCBs), fragile/brittle or porous materials | Lower thermal/mechanical load; enables impregnation concepts | Polymerization heat can still be non-trivial in some systems; bubbles/voids act like pores and carry abrasives |
| Vacuum impregnation (as part of cold mounting) | Porous, cracked, or cavity-rich specimens | Resin penetrates voids → supports edges, reduces pull-out | Inadequate degassing leads to retained air → voids and edge breakouts |
Edge Protection and Orientation
Mounting provides protection for the edges and a handle for grinding. This method facilitates simultaneous grinding of multiple materials. Additionally, it makes labeling and storing the materials easy. For this method, the orientation of the material during grinding is critical. Therefore, orient the material to have the plane of interest perpendicular to the grinding surface.
Grinding and Polishing Process: Achieving Mirror-Finish SurfacesThis process involves grinding a rough cut to a mirror-like finish for microstructure examination. This step removes scratch marks and flattens the material to observe its actual structure.
Grinding: Coarse to Fine to Reduce Damage
This process involves using SiC paper for grinding. This paper works well for grinding materials since it is hard and has sharp edges. For this method, the SiC paper ranges from 60 to 1200 grit.
SiC Paper Selection by Material
– Soft non-ferrous metals: start at 320, then progress to 400, 600, 800, and 1200
– Very soft materials (tin, lead, zinc): lightly wax the paper
– Soft ferrous metals: start at 240 and progress to 320, 400, 600, 800, and 1200
– Hard ferrous metals: start at 120/180 and progress to 240, 320, 400, 600, and 800
– Super alloys: non-ferrous-like approaches
Polishing Cloths
Three types of polishing cloths exist. Each of these materials works well for specific materials.
Diamond Suspensions and Final Polishing
The abrasive remains diamond. Polycrystalline has many cutting edges for quick removal and fine scratches. Monocrystalline has fewer cutting edges and different scratch marks. Polycrystalline produces better results and faster removal. Diamond is available as paste, suspension, and spray.
Control Parameters
Pressure and speed of grind are essential. Higher pressure removes faster but can damage subsurface material and generate heat. Higher speed (head 150 rpm and base 300 to 600 rpm) improves removal rates. Matching speed on both sides minimizes damage and maximizes uniform removal.
Common Mistakes in Grinding and Polishing
Skipping grit sizes causes damage and extends the polishing process. Too much pressure causes heat and subsurface deformation.
Grinding and polishing strategies
| Strategy | Typical use-case | What it optimizes | Watch-outs |
| SiC paper sequence (coated abrasives) | General-purpose planar & fine grinding | Accessible, flexible, broad material coverage | Cross-contamination between grits; too high pressure increases subsurface damage |
| Rigid diamond grinding disc / fine grinding disc | Hard materials; coatings/layers, nitrided or decarburized edges where flatness matters | Flatness retention; fewer steps possible vs paper sequences | Requires correct diamond + lubricant pairing; wrong choices can embed abrasives or increase relief |
| Multi-step diamond polishing + final oxide (colloidal silica/alumina) | Microsection readiness for microscopy | Scratch-free, high reflectivity, minimized deformation | Lubrication breakdown heats samples; cloth selection affects relief and edge rounding |
| Vibratory polishing (final step) | Very soft/ductile materials; when gentle removal is needed | Minimal deformation; excellent final surface quality | Long cycle times can exceed 30 minutes (plan throughput accordingly) |
Electrolytic Polishing for Soft Materials
Electropolishing is better suited for soft and smear-prone materials. It is effective on soft grades of stainless steels, aluminum alloys, and copper alloys. This technique is excellent for complex shapes and can speed up the process and eliminate surface deformation. This technique is very effective for transmission electron microscopy. Start with 600 grit size silicon carbide pre-polish.
ASTM Standards for Metallographic Preparation
ASTM standards ensure proper specimen preparation and consistency in the metallographic field.
Lab Equipment Requirements
A laboratory setup includes cutting machines, mounting presses, and grinding and polishing machines. These machines depend on the type of materials and requirements.
Consumables: A Quick Guide
Cut-off wheels, resins, silicon carbide papers, polishing cloths, and alumina solutions depend on the type of materials and requirements.
Conclusion
Mastery comes from attention to detail at every step. Cutting, mounting, grinding, and polishing have to be a cohesive process to achieve the real microstructure.
The methods and standards described in this article give a good foundation for a reliable materials analysis in 2026. Selecting the correct equipment, materials, and methods for your materials guarantees accurate quality control and failure analysis. Following these standards gives you the reproducibility that today’s industry demands.
FAQs
Q1. What is metallographic sample prep used for?
Metallographic sample prep is used to reveal the microscopic structure of materials. This structure includes the grains, phases, precipitates, and defects in materials. This is essential in material selection, quality control, and failure analysis in aerospace, automotive, and electronic materials industries.
Q2. Why is cutting technique important?
Cutting technique is important to ensure that there is no heat or damage to the material that could interfere with the results. If heat is applied during cutting, it should be removed during polishing to save time and ensure that the results show the real structure of the material.
Q3. When to use hot mounting and when to use cold mounting?
Hot mounting is used for standard metals, ceramics, and minerals that can tolerate heat. Cold mounting is used for heat-sensitive materials such as coatings, circuit boards, electronic components, and composites that have different heat expansions.
Q4. What is the correct sequence for grinding?
The correct sequence for grinding depends on the material to be analyzed. For soft non-ferrous metals, grinding should be in this order: 320, 400, 600, 800, 1200. For hard ferrous metals, grinding should be in this order: 120 or 180, 240, 320, 400, 600.
Q5. What are the advantages of using electrolytic polishing?
The advantages of using electrolytic polishing are that it overcomes the limitations of mechanical polishing, especially in the analysis of materials that smear easily. This process also takes less time and gives a consistent process for materials that have complex shapes.


