The Ultimate Guide to Grinding and Polishing: Techniques, Equipment, Materials, and Best Practices
The Ultimate Guide to Grinding and Polishing: Techniques, Equipment, Materials, and Best Practices
Grinding and polishing are two different but related steps in getting materials ready. Grinding gets rid of surface flaws and makes uneven areas flat. Polishing makes the surface look better by giving it a smooth, shiny gloss.
From our workshop experience, we know that to becoming good at both techniques, you need to know what makes them different. For example, automated grinders can make planar samples in only 1 to 2 minutes, which is the same amount of time it takes to do three traditional grinding procedures. Soft materials need a lot of lubricant that isn’t too abrasive. These processes need different ways to be lubricated.
This article covers everything from choosing the correct abrasives to doing excellent grinding sequences, no matter if you follow American ANSI/CAMI or European FEPA requirements. Also, it gives you useful advice on how to keep your polishing cloth at the right degree of moisture (moist, not wet). You’ll learn how to fix difficulties that come up a lot when you’re working on projects.
You’ll learn a lot about how to get professional-quality results in your workshop after reading this. Let’s get down to the basics!
What is Grinding and Polishing?
Material preparation relies on two processes that turn rough surfaces into finished products. Let me explain what these techniques do and how they work together.
Grinding and Polishing Explained
Grinding aggressively uses abrasive particles to get rid of surface flaws and make a smooth base by removing material. This method takes away a lot of material to flatten samples and fix any bending that happened during previous handling or sectioning. The process uses wheels, belts, or discs that are rough and cut into surfaces with a lot of force, leaving small chips on the workpiece surface.
Polishing comes after grinding and is a more refined way to finish. Instead of taking away material, it makes a smooth, shiny finish. This gentler method uses finer abrasives that roll over the surface instead of cutting into it. To get rid of small flaws and make a surface that looks like a mirror, you need to do this step.
Key differences in purpose and technique
There is more to the difference between grinding and polishing than just their definitions:
Material removal rate: Grinding takes off a lot of material quickly to shape it, while polishing takes off very little material to smooth the surface.
Tools and rough surfaces: Grinding needs rougher abrasives, like silicon carbide and aluminum oxide, that are bonded in resin or metal matrices. These abrasives usually have a grit size of 60 to 600. Polishing uses softer pads or cloths and finer abrasives (0.05 to 6 micrometres), such as diamond paste, alumina, or colloidal silica.
Surface result: Depending on the type of abrasive used, grinding can make a surface that is matte or a little rough. Polishing makes a finish that is smooth, shiny, and often looks like a mirror.
How to use: Grinding needs more forceful pressure on the workpiece. Polishing uses softer, more controlled motions.
Why both are essential in material preparation?
These steps are very important for getting materials ready for testing and use. Grinding and polishing work together to show the real structure of metals, ceramics, and other solid materials.
Grinding makes the base flat and even by getting rid of big bumps and dips on the surface. Without proper grinding, polishing can’t get the finish you want. The grinding step gets rid of bigger flaws on the surface so that polishing can begin.

Polishing gets rid of the smaller scratches that grinding leaves behind and shows the real microstructure of the specimens. Scientists need this step for microscopic examination because a surface that is free of scratches makes it easier to accurately measure grain size, phase distribution, and defects. Yes, polishing does make things look better and work better, such as making them less likely to rust and wear out.
Moving from coarse grinding to fine polishing in a systematic way makes sure that each step fixes the damage from the one before it and slowly lowers the depth of the deformation. This methodical approach makes preparing materials reliable and repeatable, which makes it easier to analyze multiple samples in the same way.
These steps help make sure that parts are the right size, work well, and work better in industrial settings. After cutting, parts might work, but they won’t fit together properly or work at their best without both grinding and polishing.
Choosing the Right Tools and Abrasives
Successful grinding and polishing depend on having the right tools and abrasives. The quality of your work depends directly on the materials you choose, just like with any other skilled craft.
Types of abrasives: SiC, Al2O3, diamond
There are three main abrasives that have changed the world of grinding and polishing. Each one has its own unique qualities:
Silicon Carbide (SiC) is one of the hardest synthetic abrasives you can find. It’s great for fine finishing work. It shines when you work with brittle materials like ceramics, glass, and carbides because it is sharper and harder than other tools. It works well with non-ferrous materials that aren’t very strong, and it makes smooth surface finishes easy.
Alumina, or Aluminium Oxide (Al2O3), is the most common abrasive for grinding jobs. It’s very strong and comes in brown, white, and pink. Brown alumina doesn’t break down quickly, so it’s great for grinding hard things like metals, drywall, and fiberglass.
Diamond abrasives are the hardest, with a Mohs hardness level of 10. These high-end options cut very well and last a long time, especially when cutting through tough materials like concrete, ceramics, and high-tensile metals.
Grit size selection and standards (ANSI vs FEPA)
Getting the results you want depends a lot on how big the grit is. There are two main standards that control how abrasives are graded:
The American ANSI/CAMI standard uses numbers to show that bigger means finer particles. This standard makes the sizes of particles more even around the average, which means cutting starts faster at lower pressures. This makes less heat and protects the workpiece from damage.
The European FEPA standard starts with a “P” (like P220) and works differently above 180 grit. FEPA papers have a smaller range of particle sizes than ANSI papers, which makes the scratch depths more even.
The grit size you choose should depend on the material and the finish you want. Coarser grits below 220 remove material quickly, while finer grits above 400 make the smooth finishes needed for polishing.
The fastest way to grind a plane is to;
- Choose the right diamond tools for your material. Don’t use aluminum oxide pads because they only polish and don’t profile.
- Check to see if your dust collection system can handle all the dust you’ll make.
- To avoid uneven removal, keep the same amount of pressure as you move.
- To make sure you’ve fixed all the damage from before, use a light microscope to look at the ground surface between stages.
In this first step, your goal is to quickly get rid of the machining allowance while keeping an eye on the depth of the grinding. This keeps the workpiece from bending when too much force is applied.
Step-by-Step Polishing Techniques
To get good at polishing techniques, you need to know both the process and the materials. When you grind something properly, it starts out rough and ends up with a mirror-like surface.
Polishing by hand and by machine
When you polish by hand, you can hold the workpiece and move the polish in circles or back and forth. You need to keep the same amount of pressure until you get the correction you want. This method gives you great control for fine work, but it takes a lot of skill and hard work.
Automated polishing machines keep the same amount of pressure and movement all the time. Random orbital polishers move in different ways and cut very well, but they are still easy for beginners to use. These machines are great for beginners because they are easy to use and work well. Dual-action polishers are better for more advanced tasks because they move in random orbits. They are safer and more forgiving than rotary polishers that spin quickly in one direction.
Diamond, alumina, and silica are all polishing abrasives
Diamond abrasives are the best choice for polishing. There are two types: monocrystalline and polycrystalline. Studies show that polycrystalline diamonds cut through more materials faster than monocrystalline diamonds.
Aluminum oxide (Al₂O₃) is a useful abrasive for everyday metallographic preparation. Sol-gel alumina makes surfaces look better than regular calcined alumina. No matter what you do to try to break up the clumps, the traditional version tends to show some clumping.
Colloidal silica particles are almost round and have a pH of about 10. It works by both chemical and mechanical means. This makes it great for making surfaces that don’t get damaged, and it often makes color etchants work better.
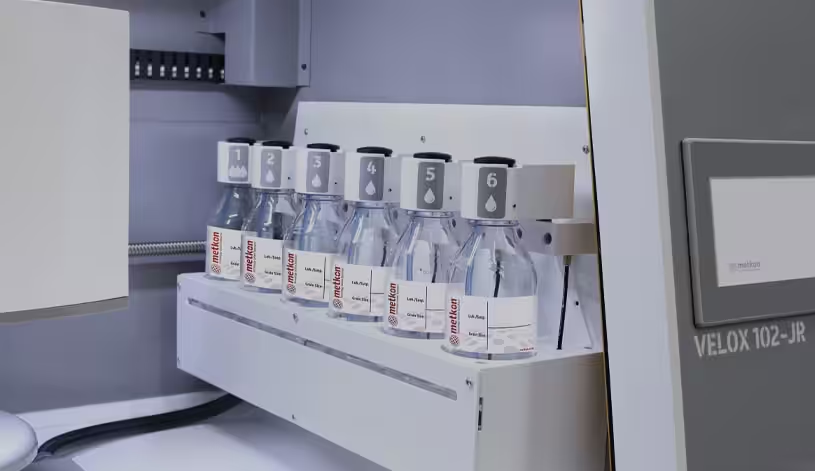
Lubricants and how they help polish
There are three important things that lubricants do. They lower the temperature during the process, cut down on friction between the specimen and polishing medium, and help get rid of polishing residues. These steps protect both the sample and the polishing equipment from damage and make the surface better.
Final polishing with vibrating or electro-polishing
Vibratory polishing makes high-frequency horizontal movement without any vertical movement. This makes polishing easier. This method works best on materials that are sensitive or ductile, and it makes surfaces that are perfect for precision analysis.
Electropolishing is like reverse electroplating in that it uses electricity to remove material. The workpiece is usually put in an acid electrolyte bath, where it acts as the anode. This method makes surfaces that look great and are easy to clean. It also selectively removes iron and raises the chromium and nickel levels in stainless steel.
Advanced Tips and Troubleshooting
Even skilled craftsmen have trouble grinding and polishing materials. If you learn how to fix common problems, you can get perfect results.
Avoiding common polishing defects
When you polish something, you might notice a lot of problems, such as scratches from cross-contamination or skipping grit sizes, smearing from using the wrong lubricant or cloth, stains left by polishing compounds, and deformation from too much pressure or heat. Polishing surfaces with high resilience can round off edges, and different removal rates can make materials with different hardness phases feel more comfortable. These problems are part of the system, but you can stop them. Start by going through the abrasive grits in a logical order, making sure not to skip any steps. Before moving on to the next step, check your sample under low magnification.
Cleaning between steps to prevent contamination
If you don’t clean between steps, abrasives can cross-contaminate and ruin your workpiece. After each step, water is a good way to rinse specimens. A cotton swab can help get rid of loose abrasive particles. An ultrasonic cleaner with the right surfactant is needed for deep cleaning. For the last clean, use distilled or deionized water and then alcohol to get rid of the water and speed up the drying process. To stay clean, keep your clothes and food in sealed containers.
Adjusting pressure and movement for better results
Polishing works best when there is even, moderate pressure. Too much force makes the surface wear unevenly, and too little pressure leaves the polishing unfinished. Make smooth, even circles or back-and-forth motions that slightly overlap each time. When polishing delicate materials, you need to lower the speed and pressure, especially in the last stages. It’s very important to keep the temperature stable. Grinding at high speeds without enough coolant can cause changes in the metal, such as recrystallization, oxidation, or discoloration.
When you learn how to grind and polish, you become a true craftsman. This article talks about the main differences between these two processes that work together. Grinding takes away a lot of material, while polishing makes surfaces smooth and shiny. Choosing the right abrasives, like silicon carbide and aluminum oxide or high-quality diamond compounds, has a big effect on your results.
Anyone who works with their hands can get professional-quality results if they follow a plan. The secret to getting materials ready is to use a logical order of coarse to fine abrasives. Each step should get rid of the marks from the step before it and make the deformation depth smaller. You can’t skip steps.
Choosing the right tools is just as important as using them correctly. Keeping even pressure, steady movement, and clean surfaces between steps will help you avoid common problems like scratches, smears, and cross-contamination. Of course, patience is very important. If you rush through any step, you will only be disappointed.
You can use these techniques in a lot of different situations. You will be able to get better finishes more quickly if you practice. You’ll understand not only the steps but also why they are important, which will help you solve problems when they come up.
This full explanation of the basics of grinding and polishing should give you the confidence to start your next project. It takes practice to go from rough material to a mirror finish, but every careful step counts when you want to get professional results.
Key Takeaways
Learn the basics of preparing materials with these important tips from workshop experts who have spent years perfecting their grinding and polishing skills.
• Grinding takes away a lot of material, while polishing makes surfaces smoother. Don’t skip any grinding steps because each one gets rid of damage from the one before it.
• Pick the right abrasives: use silicon carbide on brittle materials, aluminum oxide on metals, and diamond on hard surfaces for the best results.
• Don’t skip steps when going from coarse (60-600) to fine (0.05-6 micrometres) grit to avoid scratches and contamination.
• To keep workpieces from getting ruined, clean thoroughly between each stage with ultrasonic cleaners and distilled water.
• Use smooth, circular motions to apply steady, moderate pressure. Too much pressure causes uneven wear, while not enough pressure leaves polishing unfinished.
The systematic process from rough grinding to fine polishing makes sure that the results are always the same and of professional quality. It’s more important to be patient and use the right technique than to have expensive tools. If you rush through any step, you’ll end up with results that are not what you wanted and have to start over.
FAQs
Q1. What are the main differences between polishing and grinding?
Grinding is a harsh process that removes material to make surfaces flat and get rid of flaws. Polishing, on the other hand, is a gentler process that gives surfaces a smooth, shiny finish. Polishing uses finer abrasives to make the surface smoother, while grinding uses coarser abrasives to take off more material.
Q2. How do I pick the best abrasives for polishing and grinding?
Choose abrasives based on the material you are working with and the finish you want. Use silicon carbide, aluminum oxide, or diamond abrasives with coarser grits (60–600) for grinding. Use diamond paste, alumina, or colloidal silica with finer grits (0.05–6 micrometres) to polish. When deciding between these options, think about how hard your material is.
Q3. What are the benefits of wet grinding compared to dry grinding?
Wet grinding can make particles smaller (down to the nanometer range), use less power, get rid of airborne dust, and work better with materials that don’t like heat. It’s best for jobs that need very smooth finishes or that involve materials with a lot of moisture. But it needs more complicated equipment to set up than dry grinding.
Q4. How can I avoid common polishing problems?
To avoid problems like scratches, smudges, and stains, use abrasive grits in a logical order without skipping any steps. To avoid cross-contamination, make sure to clean well between each step. Use steady motions and apply even, moderate pressure. After each step, look at your sample under low magnification before moving on to the next step.
Q5. What part do lubricants play in the polishing process?
Lubricants are very important for polishing because they lower the temperature, reduce friction between the specimen and the polishing medium, and help get rid of polishing residue. This keeps the sample and the polishing equipment from getting damaged, which makes the finished surface better.


