
Metallographic Polishing Machine Expert Guide 2026
Metallographic Polishing Machine Expert Guide 2026
Picking the metallographic polishing machine often proves to be the hinge between catching vital microstructural nuances and letting them slip by unnoticed. Securing a mirror‑like finish on a specimen is non‑negotiable for precise metallographic analysis, especially when the focus falls on grain boundaries, phase distributions or subtle material flaws.. The sheer breadth of options—ranging from basic manual rigs, to fully automatic powerhouses—can overwhelm both newcomers and seasoned metallographers alike.
Even though many labs pour money into gear they keep hitting the same polishing snags—comet tails, rounded edges and stray abrasive deposits. Often the culprit is a mismatch between the machine and the material or its intended use. As for picking between polishers for softer substances and integrated grinding‑polishing rigs, for tougher samples that decision rests on your particular research or quality‑control demands. This all‑encompassing handbook delves into the varieties of metallographic polishing machines unpacks the polishing workflow one stage at a time and compiles seasoned selection criteria needed to secure equipment that reliably produces uniform top‑notch outcomes, for your metallographic analysis needs.
Rockwell Hardness Testing: Essential Guide for Quality Engineers
Understanding the Role of Polishing in Metallography
Metallographic polishing serves as the foundation for accurate material analysis and interpretation. Proper polishing transforms a rough sample into a precisely prepared specimen that reveals its genuine microstructural characteristics. Unlike preliminary preparation steps, polishing specifically addresses surface quality at the microscopic level, creating conditions necessary for reliable scientific observation.
Why deformation-free surfaces matter in analysis
The goal of polishing lies in fashioning a surface that is not only perfectly flat but also utterly free of deformation thereby delivering an authentic snapshot of the material’s true microstructure. Though it may seem like a cosmetic step the procedure actually carries weighty scientific implications. When a specimen is polished correctly grain boundaries, distinct phases and embedded inclusions appear with striking clarity allowing for quantification of microstructural features.
Surfaces that remain wholly free of any deformation are especially crucial because they:
- Offer data for microhardness measurements together, with the ensuing analysis techniques.
- Watch out for scratches that could obscure the microstructural features.
- Permit an etching operation to engender phase contrast.
- Guard against any misunderstanding of the material’s characteristics.
The polishing technique must avoid creating any features—disturbed metal, pitting, dragged‑out inclusions “comet tailing,” staining or relief between different constituents. These artifacts can skew results. For example scratches on a sample may deform the indentation left by a hardness test leading to measurements. Moreover a surface that isn’t polished properly can conceal manufacturing defects that would otherwise be visible, during quality‑control inspections.
When polishing is taken to the extreme the surface ends up as reflective as a mirror and any blemishes that linger are more likely to reveal flaws to the sample itself rather than artifacts introduced during preparation. Consequently such an immaculate finish becomes a prerequisite, for a range of pursuits from meticulous failure analysis to cutting‑edge advanced materials research.
How polishing fits into the sample preparation workflow
Metallographic polishing is the culminating, step in readying a specimen, for microscopic observation following the earlier procedures of sectioning, mounting and grinding. In this phase the polishing action gently wipes away the distortions introduced by those prior operations ultimately unveiling the authentic microstructure for thorough analysis.
Usually the polishing workflow evolves, across three phases:
Pre-polishing (Coarse Polishing). Removes an amount of material in a short span thanks to stiffer cloths and larger diamond abrasives (, about 6‑9 μm). This first pass clears the scratches left by grinding while keeping the surface flat.
Intermediate polishing – clears deformation and smear layers by deploying medium‑grade abrasives, often 3 µm diamond. In the case of substrates a chain of intermediate stages may be essential each one incrementally diminishing the residual scratches.
Final Polishing – produces a reflective scratch‑free surface using ultra‑fine abrasives like 1 µm diamond or colloidal silica/alumina suspensions (≈0.04–0.05 µm). This step wipes out the traces of deformation.
Metallographic Cold Mounting Process: Expert Guide, Resin Selection &; Void-Free Techniques
Throughout the operation keeping everything spotless between each stage is crucial—any stray coarse abrasive grain can easily slip into the polishing pass and spoil the finish. Likewise selecting the amount of lubrication is a delicate balance, between cooling and lubricating tailored to the material’s traits; softer substrates generally call for a richer lubricant film while requiring a gentler less aggressive abrasive.
A well‑polished surface underpins any analysis—optical microscopy, electron microscopy, microhardness testing to name a few. Consequently the choice of a metallographic polishing machine together with the right pads, pastes and films is essential for delivering repeatable reliable data, across the full spectrum of material types.
Types of Metallographic Polishing Machines Explained
Getting a flawless. Finish on metallographic specimens hinges on the right polishing machine, which in turn makes it possible to examine the microstructure under a microscope with pinpoint accuracy. These machines fall into three categories—manual, semi‑automatic and fully automatic—each engineered for a specific blend of precision and throughput. The manual type hands the reins completely to the operator, a boon for laboratories that value flexibility and the ability to tailor workflows on the fly. Semi‑automatic models on the hand pair preset parameters such, as force, speed and polishing time with a touch of user intervention tightening repeatability while still allowing some hands‑on control. In contrast automatic polishing systems deliver end‑to‑end automation offering programmable stages that handle grinding, polishing and the final finish. By removing the element they slash the chance of slip‑ups and lock in repeatable results batch after batch. The newest models often sport built‑in water‑cooling loops, speed‑adjustable platens and a wide‑range compatibility roster for consumables—making them a staple, in metallography and quality‑control laboratories.

Step-by-Step Polishing Process and Machine Requirements
Effective metallographic polishing proceeds through a march of clearly delineated phases each demanding its own set of machine settings to hit the optimal outcome. A successful prep hinges on a stepwise shift from coarse grit, to finer abrasives with the machine parameters being fine‑tuned at every turn.
Pre‑polishing: a stage where a hefty amount of material gets stripped away by means of hard cloths.
Pre‑polishing is meant to strip a generous amount of material in the shortest time feasible yet still keep the surface flat. This opening step calls for hard‑pressed pads used together with a diamond slurry whose grains range from about 9 µm, to 15 µm. Machine settings generally include:
- It turns at a hundred and fifty revolutions, per minute.
- A force of 25 N was applied.
- The processing period generally falls within a five‑to‑seven‑minute window.
- Aim for the diamond suspension to trickle out at one drop every five to ten seconds.
The Ultimate Guide to Grinding and Polishing: Techniques, Equipment, Materials, and Best Practices
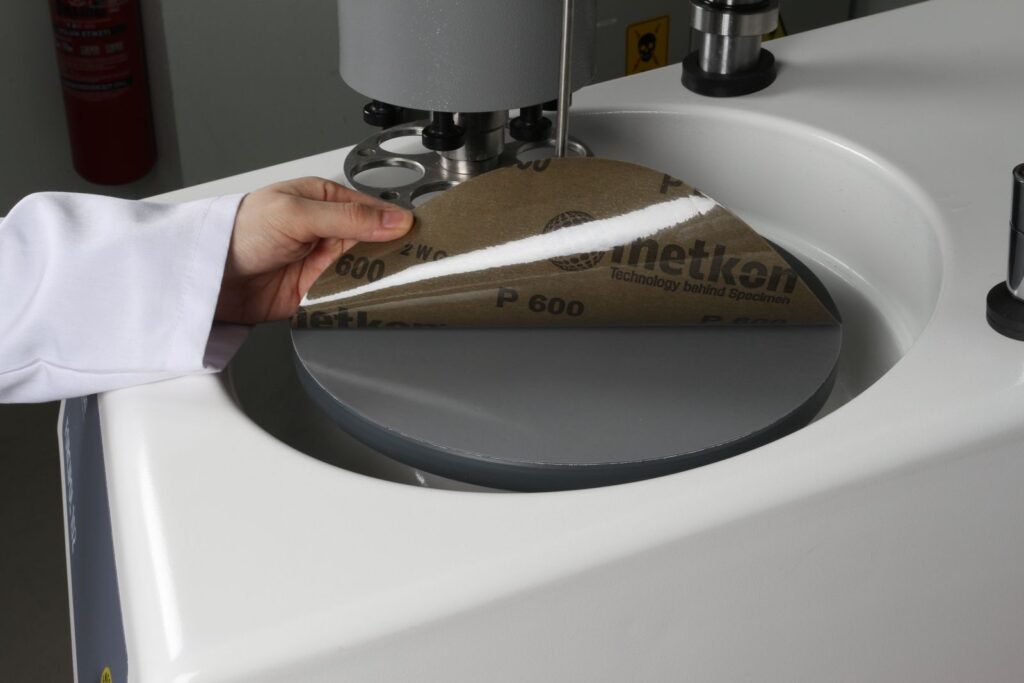
Hard synthetic cloths turn out to be remarkably effective, on the substrates—ceramics, hardened steel and gray cast iron. Their perforated chemical‑fiber construction provides stock removal while offering an unusually long service life. In the stage maintaining the motion of the diamond abrasives is essential to preserve the rolling action that underpins the necessary material removal.

Intermediate polishing — stripping off the smear layers
Intermediate polishing functions, as a handoff stage clearing away deformation and smear layers left behind by earlier processing. This phase typically calls for:
- Medium‑hard fabrics
- Diamond suspensions span 3 μm to 9 μm, in size around 6 μm.
- Reduced pressure (on the order of 20 N)
- When the machine operates at 150 RPM, the processing time typically ranges from four to six minutes.
When working with hard materials a series of intermediate polishing steps is usually required, gradually reducing the diamond grit from roughly 9 μm down to, about 3 μm. The pads used at these stages must walk a line—aggressive enough to shed material yet gentle enough to start refining the surface. Before moving on to the polish every visible scratch left from the previous passes has to be fully removed to achieve the best possible result.
Final Polishing: pulling off a flawless mirror‑bright surface
The final polishing pass leaves a mirror‑bright surface, precisely the flawless finish needed for metallographic examination.
This pivotal phase calls for:
- Feather-soft nap-laden cloths
- Finely ground abrasives—diamond particles or colloidal suspensions—typically span the 0.05 µm to 1 µm range.
- Operate at a pressure—, around 10 to 15 N—and a gentler speed, roughly 120 to 150 rpm.
- There’s an increase, in lubrication compared with earlier stages.
- Expect the processing to run somewhere, in the two‑to‑five‑minute window.
Mechanical polishing and chemical‑mechanical polishing impose different demands on the equipment. When the removal is purely mechanical a diamond slurry of about 1–3 µm paired with a polishing pad suffices. In contrast the chem‑mech approach relies on an alkaline slurry—commonly colloidal silica, in the 0.04–0.05 µm size range.
Proper lubrication of the polishing machine is indispensable at every stage of the process. For workpieces a relatively generous amount of oil together with a gentle abrasive tends to work best while hard workpieces benefit from a leaner oil feed but a coarser abrasive since they wear more rapidly. The polishing cloth should stay damp—just moist enough—because over‑saturation creates a film that buffers the specimen from the disk and reduces material removal. Once those settings are in place automated polishing units can keep the variables locked in delivering steady reproducible results that make them a go‑to choice, for any lab that values consistency.
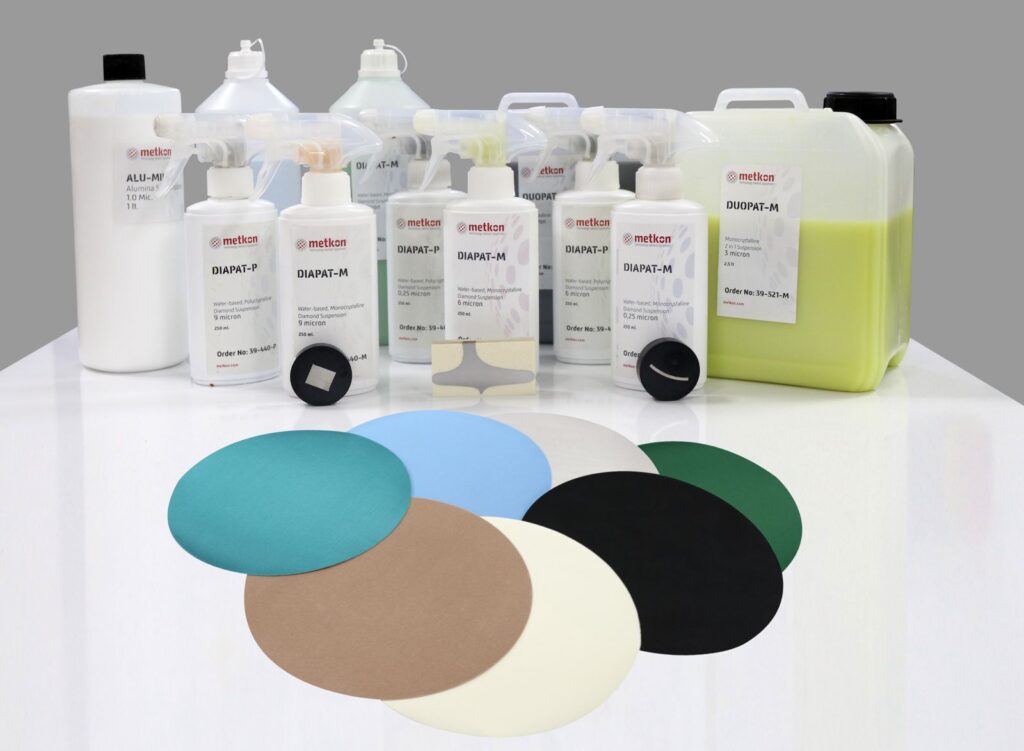
Finding the Ideal Consumables, for Your Machine
Choosing the consumables directly influences how good metallographic samples turn out. How your polishing machine interacts with those consumables ultimately decides whether you’ll end up with analysis‑ready surfaces.
Diamond Abrasives: Monocrystalline versus Polycrystalline
The geometry and internal makeup of diamond abrasives have an impact on how effectively they polish. Monocrystalline diamonds come with blocky edges and a multitude of cutting facets, which makes them a cost‑effective option, for most routine tasks. Because each piece is a crystal its performance stays reliably consistent over time making it well‑suited for both the initial stock‑removal pass and the intermediate polishing stages.
Polycrystalline diamonds by contrast are built from a swarm of crystals welded together producing a multi‑faceted lattice that offers a greater number of cutting edges. That architecture translates into a material‑removal rate shaving off preparation time. Numerous studies have verified that polycrystalline diamond cuts across a broad spectrum of materials than monocrystalline alternatives. In short polycrystalline abrasives excel on hard substances on multiphase alloys with wide hardness variations and, in any application that demands exceptional flatness.
Oxide Suspensions: A Look, at Silicon Dioxide Versus Aluminum Oxide
For the polishing stage oxide suspensions combine mechanical abrasion with chemical action. Colloidal silica suspensions— at pH 10 and with particle sizes near 0.04–0.05 µm—produce a chemo‑mechanical polishing effect that’s especially advantageous, for tough‑to‑polish materials. Silicon dioxide works well on austenitic steels, aluminum alloys, titanium alloys and precious‑metal alloys.
Aluminum oxide suspensions, available in grain sizes spanning 0.1 to 0.06 µm are chiefly recommended for brass, low‑alloy or unalloyed steels and gray cast‑iron grades. Alumina suspensions produced via the sol‑gel route—such as the MasterPrep line—generally deliver smoother surface finishes, than those derived from the calcination process, which frequently suffers from particle agglomeration.
When corrosion prevention is essential opting for an alcohol‑based suspension, than a water‑based one is advisable.
Polishing Cloths Pile Height and Elasticity: Points Worth Mulling Over
The microstructure and hardness of a material should be the compass that guides cloth selection. When the process reaches the stage, hard polishing cloths (nylon, polyester) keep the surface of very hard workpieces—tool steels, ceramics—flat. By contrast medium‑hard cloths ( silk, silk) fit the bill for general polishing tasks and, for dealing with multi‑phase materials.
Pile height exerts an influence on the fidelity of edge retention—when the pile is kept low the edges and boundaries remain sharply delineated whereas an elevated pile yields a more immaculate surface sheen albeit at the cost of crisp edge definition. In the concluding polishing phase practitioners habitually opt for nap cloths spun from fibers (wool) or, for synthetic velvet the choice largely dictated by the material under treatment.
As the preparatory steps roll out the stretchiness of polishing cloths ought to rise :
- Pre‑polishing: Use a low‑elasticity cloth to keep the edge sharp.
- Polishing: its elasticity sits in the medium range.
- Final polishing: go with cloths that stretch more and sport a nap and pair them with lubricants of greater viscosity.
Soft cloths used to smooth out edges
Edge rounding throws a wrench into the exactness of appraisal on a specimen. The effect crops up whenever components with hardness are processed side by side; the softer material erodes faster than the harder producing a two‑level surface that merges via a gently rounded seam. To curb the issue choose grinding and polishing disks that feature a base for the pre‑polishing steps. Moreover keep the polishing steps as brief, as possible especially when the workpiece is a composite.
Zeroing in on the metallographic polishing machine ultimately governs both the quality and the precision of your material analysis. Over the span of this guide we have examined how deformation‑free surfaces lay bare the microstructural nuances that underpin exact metallographic scrutiny. Accordingly the machine you opt for—be it an apparatus valued for its flexibility a semi‑automatic setup that strikes a middle‑ground, in control or a fully automatic system that guarantees repeatable consistency—should dovetail with the particular needs of your laboratory.
Metallographic Grinding Tips: Expert Guidance for Perfect Sample Preparation
Material characteristics are the linchpin in selecting the equipment. Soft ductile workpieces thrive under vibratory polishing while tougher harder specimens typically demand an integrated grinding‑polishing unit. Moreover the orderly march, from pre‑polishing through the stage to the final polish calls for precisely tuned machine parameters to achieve optimal results.
Selecting the consumables can give polishing results an extra boost. Diamond abrasives, oxide suspensions and polishing cloths need to be matched to both the material’s characteristics and the intended surface finish. Paying attention to these choices keeps common preparation artifacts—comet tails, pencil effects, abrasive deposits and edge rounding—out of the final product.
Even the sleekest high‑tech gear can’t magically fix a technique or a mis‑chosen consumable. The flashiest automatic polisher will still churn out finishes if it’s paired with the wrong grit or run under off‑spec parameters. Consequently truly grasping both the material’s demands and the machine’s capabilities becomes the linchpin, for metallographic preparation.
Metallographic polishing straddles the line between science and art marrying textbook knowledge with the grit of practice. When you’ve internalized the suite of polishing equipment the step‑by‑step process and the usual pitfalls choosing a machine becomes a matter of confidence—ensuring you obtain specimens that are consistently fine‑grained and fit, for precise metallographic analysis. Placing the technology and the expertise to wield it into the workflow pays off handsomely delivering sharper analytical results while squeezing the most out of lab efficiency and productivity.


