Choosing the Right Grinding & Polishing Machine for Your Lab
Choosing the Right Grinding & Polishing Machine for Your Lab
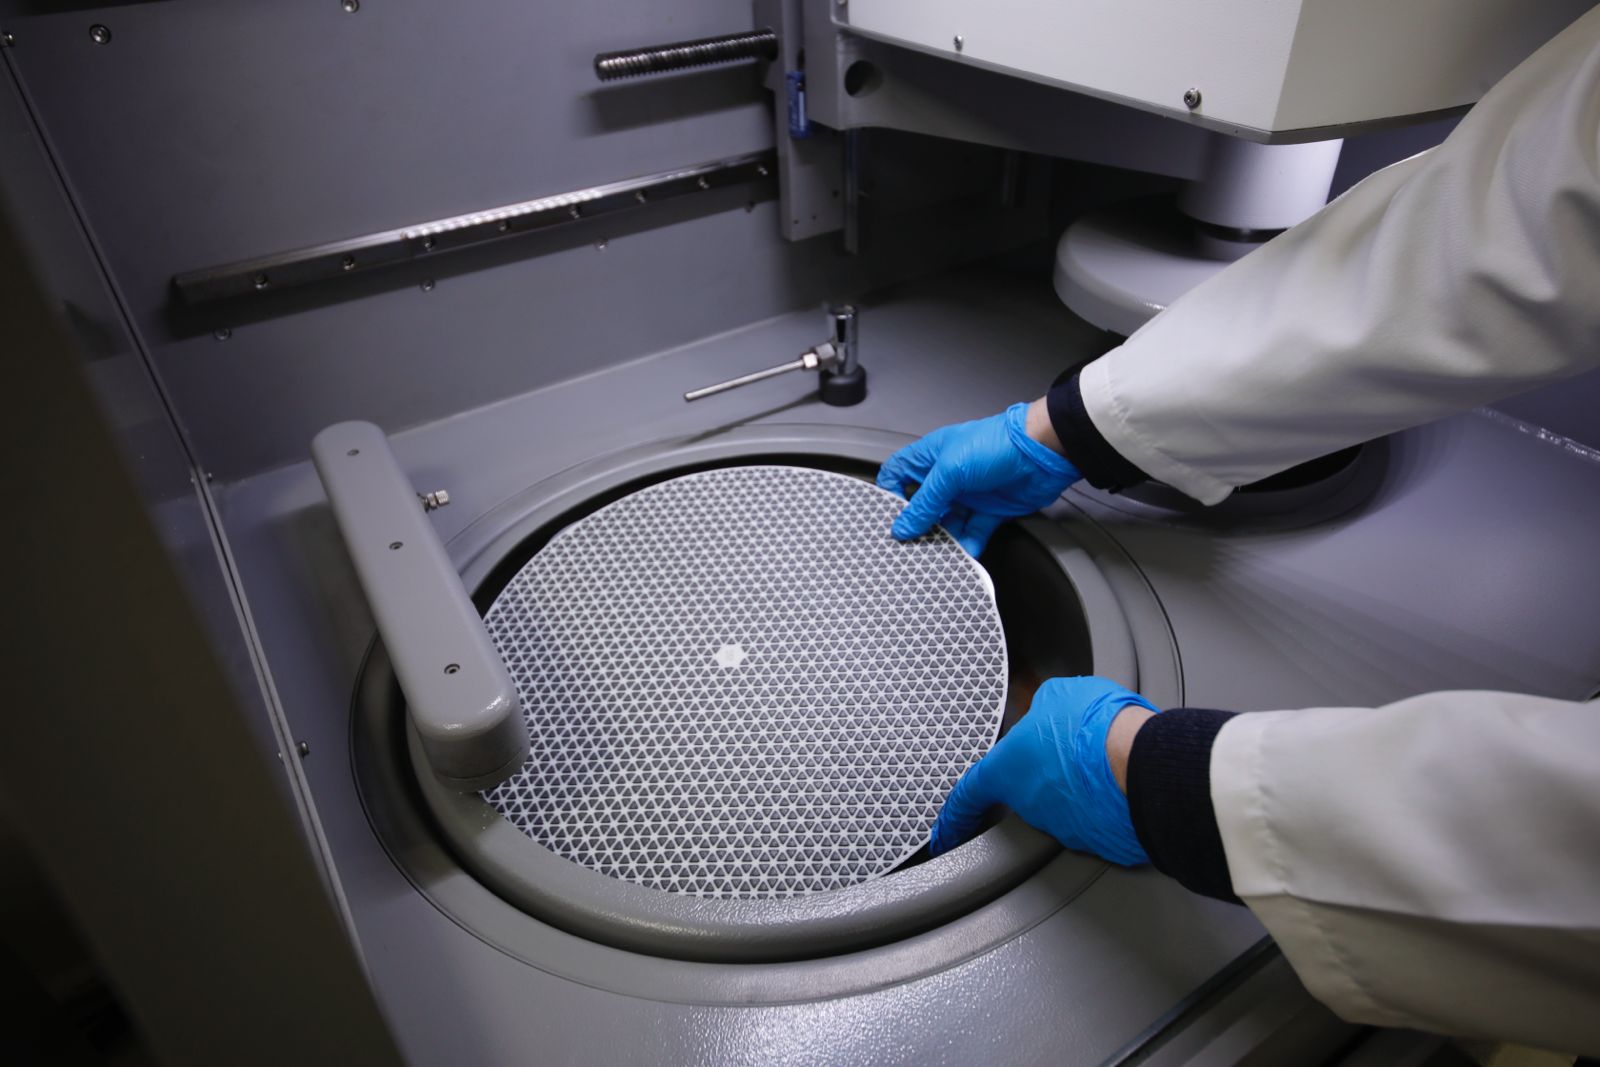
Automated grinders can complete grinding & polishing processes in just 1 to 2 minutes—matching the time needed for three traditional grinding procedures. Your lab’s results depend on knowing what different machines can and cannot do. Our labs use specialized metallographic grinding and polishing equipment. The setup has grinders, polishers, and combined grinder-polishers that work with metal, ceramic, mineral, and composite surfaces. We start the polishing process with the finest grit size. This helps create a flat surface and quickly removes sectioning effects. Automatic grinding and polishing machines give better consistency and optimize the whole process. A good grinding sequence uses silicon carbide papers that get progressively finer, usually from 240 to 600 grit. Diamond abrasives work best for tougher jobs because of their superior hardness.

This piece will help you pick the right grinding and polishing machinery for your lab. You’ll learn what technical and practical factors matter most to make the best choice for your needs.
Grinding and Polishing Requirements for Modern Laboratories
Material analysis success in laboratories depends on how well samples are prepared. Metallographic preparation wants to break down a material’s technical properties – a significant factor that drives both material development and quality control applications.
Material Types Commonly Processed in Labs
Lab grinding and polishing equipment must work with materials of all hardness levels. Steel with hardness between 35-65 HRC needs just a three-step preparation method. Magnesium’s soft nature just needs multiple preparation steps that take about 45 minutes. Diamond abrasives are essential for ceramic materials because of their extreme hardness. These materials need diamond grinding disks for grinding and diamond suspension on hard polishing cloths for polishing. There’s another reason why preparation gets complex – composite materials mix both hard and soft components. This forces technicians to pick preparation methods based on what they want to analyze.
Why Surface Finish Matters in Metallography?
The quality of surface finish plays a vital part in how accurate your analysis will be, especially for optical microscopy, electron microscopy, and microhardness testing. A well-polished specimen lets you see grain boundaries, phases, and inclusions clearly. This clarity helps quantify microstructural features accurately. Surface roughness helps predict how mechanical parts will perform since irregular spots often become breaking or corrosion points. On top of that, flat surfaces give you accurate results in XRD of solids and GDS. Scientists might misread important material characteristics without proper surface preparation.
Differences Between Grinding and Polishing Objectives
Grinding and polishing each serve unique purposes in preparation. We used grinding to remove material quickly, fix surface flaws, and create a flat reference plane. This process typically uses rougher abrasives like silicon carbide and aluminum oxide, which are bonded in resin or metal matrices. These abrasives come in grit sizes from 60 to 600. Polishing creates a smooth, shiny finish through gentler methods. It uses finer abrasives (0.05 to 6 micrometers) like diamond paste, alumina, or colloidal silica. The main difference is clear – grinding shapes specimens by removing lots of material quickly, while polishing takes away very little to create that mirror-like surface needed for accurate microstructural analysis.
Surface Grinding Techniques: Perfect Steel Sample Preparation for OES/XRF
Key Machine Types for Grinding and Polishing
Your lab’s success starts with choosing the right equipment type. Let’s get into the main machine categories that could work for your lab setup.
Bench-top vs Floor-mounted Machines
Bench-top grinding and polishing machines are a great way to get advantages in lab settings through their compact design and versatility. You can place these smaller units right on workbenches, which works perfectly for labs with limited space. We valued these bench-top models because you can move them around when needed.
Floor-mounted machines give you better stability and power for heavy-duty industrial work. These units bolt directly to the floor and reduce vibration during operation. Velox 102 and similar floor-mounted systems need more room with footprints of 2045x902x1690h, but they can handle larger samples and higher volumes.
Grinder, Polisher, and Grinder-Polisher Units
Grinders use bonded abrasives on stones, wheels, belts, or disks to remove material quickly. They work best at removing material and creating original surface flatness. Polishers, on the other hand, create bright, smooth finishes with loose abrasives or fine-grit products.
Grinder-polishers combine both functions in one machine—especially when you have limited bench space. Forciplan 352 shows what these machines can do with its 1hp motor and 14-inch platen that works with samples up to 220mm in diameter.
Automatic Grinding and Polishing Machine Capabilities
Automatic systems boost productivity while delivering consistent results. These machines come with:
- Variable speed control (50-500 rpm) to optimize material processing
- Programmable settings that store up to 200 preparation methods for consistent procedures
- Central force application (20-350 N) or individual force application (5-80 N) for exact pressure control
- Automatic dispensing systems that apply abrasives and lubricants consistently
The Velox series and similar fully automated systems are flexible solutions that work great in high-volume production environments. These machines finish grinding processes in 1-2 minutes and replace up to three traditional grinding steps.
Choosing the Right Abrasives and Accessories
Your choice of abrasives and accessories directly affects the quality of metallographic preparation. The right combination of these consumables with your specific materials will give optimal results from grinding and polishing equipment.
SiC vs Al2O3 vs Diamond Abrasives
Silicon carbide (SiC) is sharper and harder than aluminum oxide but less durable because of its brittle nature. It works exceptionally well on glass, plastic, and ceramics, making it the perfect choice for non-ferrous metals and hard non-metals. The regular black SiC delivers better grinding results, while green SiC produces superior polished surfaces.
Aluminum oxide (Al2O3) remains the most popular abrasive in woodwork and metalwork. It delivers better results than SiC on several materials such as bare wood, painted surfaces, and metals. Brown aluminum oxide, among its brown, white, and pink varieties, offers the highest durability when sanding hard materials like metals, drywall, and fiberglass.
Diamond abrasives have a Mohs hardness of 10 and provide better cutting efficiency and longevity, particularly with tough materials like concrete, ceramics, and high-tensile metals.
Grit Size Selection: ANSI/CAMI vs FEPA Standards
ANSI/CAMI (American) and FEPA (European) are the two main standards that govern abrasive grading. ANSI/CAMI uses numbers (24 coarse to 1200 super fine), while FEPA designations include a “P” prefix (P60 to P4000).
These systems have a fundamental difference – ANSI/CAMI papers feature wider particle size distributions than FEPA papers. The broader range helps cutting start faster at lower pressures, which generates less heat and causes less damage.
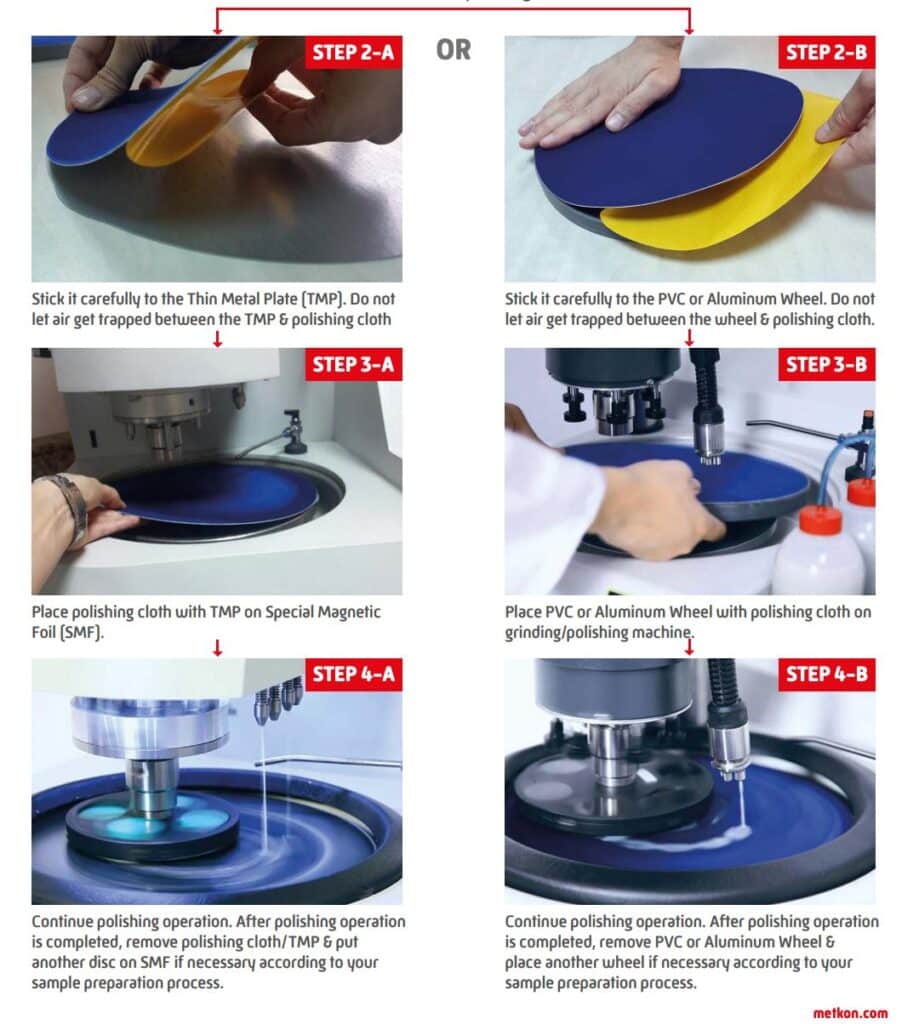
Polishing Cloth Types and Their Applications
Different polishing cloths serve various purposes:
- Woven cloths maintain excellent flatness and work best with engineering materials including ferrous metals and ceramics.
- Non-woven cloths excel at holding lubricants and abrasives, making them ideal for hard materials like glass and sapphire.
- Flocked cloths let you control final polishing precisely to achieve mirror-like finishes.
Lubricants for Heat Control and Debris Removal
Lubricants play three vital roles: they reduce processing temperature, decrease friction between specimens and polishing media, and remove polishing residues. Water-based lubricants need 4-6 drops per minute during grinding and 2-3 drops for intermediate polishing. Oil-based options perform better with slower flow (1-2 drops per minute) because they retain diamond particles more effectively.
Lab-Specific Considerations for Machine Selection
The final significant step in selecting grinding and polishing equipment involves evaluating your laboratory’s specific needs. These real-world factors help determine if a machine fits your workflow.
Sample Throughput and Automation Needs
Labs of all sizes have substantially different throughput requirements. Manual sample preparation takes 1-2 hours, while automated systems complete the work in 25-45 minutes. This boosts lab productivity by about 60% without adding staff. Semi-automatic grinder-polishers work great for high-volume operations with 8+ hour shifts. Technicians load samples, hit start, and work on other tasks. The Velox 102 fully automated system needs just 5 minutes to set up with consumables and specimen holders before it runs on its own.
Specimen Size and Mounting Compatibility
Standard mounts make sample handling easier across all preparation stages. The best practice keeps at least 3mm between the sample edge and mount perimeter. The mount’s diameter should not exceed 50% of the sample’s diameter. Today’s mounting presses work with various specimen sizes, usually between 25-50mm diameter. Most polishing machines come with holder options that fit standard mount dimensions.
Noise, Dust, and Safety Features in Lab Environments
Labs must have hearing conservation programs when noise hits 85 dBA during an 8-hour shift, according to OSHA. Common lab equipment like refrigerated centrifuges can reach noise levels of 65 dBA. Sound enclosures help reduce noise and contain dust effectively. Modern grinding machines now include self-cleaning features that reduce cross-contamination risks.
Conclusion
The right grinding and polishing equipment makes a huge difference in any lab doing metallographic analysis. Our piece covers different machine types, abrasives, and key factors that substantially affect sample preparation quality.
Automated systems without doubt give you amazing benefits in consistency and efficiency. They cut down preparation time from hours to just minutes while keeping superior surface quality. Your budget might make you think twice about whether this automation matches what your lab actually processes.
Space and processing volume play a big role in picking between bench-top and floor-mounted systems. A versatile bench-top unit works great for smaller labs. High-volume operations do better with strong floor-mounted systems that deliver consistent results.
Your choice of abrasives definitely deserves attention. Diamond abrasives work best with very hard materials even though they cost more. Silicon carbide and aluminum oxide are economical solutions for standard applications. The quality of your metallographic samples depends on finding the right mix of abrasives, grit sizes, polishing cloths, and lubricants.
Smart labs never skip checking noise levels, dust management, and safety features when picking equipment. These factors affect workplace comfort and help you follow safety rules while keeping your equipment reliable longer.
A great grinding and polishing setup needs to match your technical needs with what works in your lab. You’ll get the best results when you know your material properties, preparation goals, and what your equipment can do. This piece gives you the knowledge to pick machinery that matches your lab’s unique needs and consistently prepares high-quality specimens for years ahead.
Key Takeaways
Selecting the right grinding and polishing machine requires balancing technical requirements with practical lab constraints to achieve optimal metallographic results.
• Automated systems boost efficiency by 60% – reducing preparation time from 1-2 hours to 25-45 minutes while ensuring consistent surface quality across samples.
• Match abrasives to material hardness – use diamond for ceramics/hard materials, SiC for non-ferrous metals, and Al2O3 for general metalwork applications.
• Consider total ownership costs over initial price – a $100K instrument typically costs $175-200K over its lifetime, making quality equipment more cost-effective long-term.
• Evaluate throughput needs before automation – manual preparation suits low-volume labs, while high-volume operations benefit from semi-automatic or fully automated systems.
• Factor in lab environment constraints – noise levels, dust control, space limitations, and safety features significantly impact daily operations and regulatory compliance.
The key to successful metallographic preparation lies in understanding your specific material requirements, processing volume, and laboratory constraints. Whether you choose a compact bench-top unit or a fully automated floor-mounted system, the right combination of machine capabilities and consumables will deliver the mirror-like surface finishes essential for accurate materials analysis.


