Metallographic Polishing Guide: Step-by-Step Mirror-Finish Parameters & Troubleshooting Tips
Metallographic Polishing Guide: Step-by-Step Mirror-Finish Parameters & Troubleshooting Tips
Have you ever had difficulties obtaining that perfect mirror finish on your metallurgical samples? Metallographic polishing is an art and a science that can either make or break your material analysis results. In our lab, we’ve discovered that as much as 80% of microstructural analysis errors are due to incorrect sample preparation techniques.
Achieving a flawless surface requires careful attention to each step of the metallographic sample preparation process. From selecting the right equipment to controlling critical polishing parameters like RPM and load, every detail matters. Throughout this guide, we’ll share our step-by-step approach to mirror finish polishing based on decades of practical experience. Additionally, we’ll cover how to troubleshoot common polishing defects such as scratches, pull-outs, and edge rounding that can compromise your results.
What is Metallography? Definition, Techniques & Industrial Applications
Whether you’re working with soft aluminum alloys or hardened tool steels, this comprehensive guide will help you optimize your metallographic polishing techniques. By the end, you’ll understand not only the “how” but also the “why” behind each step in the process, enabling you to consistently produce high-quality specimens for accurate microstructural evaluation.
Understanding the Metallographic Polishing Workflow
Metallographic polishing forms the backbone of material science analysis, allowing researchers to reveal hidden microstructural details invisible to the naked eye. When examining the microstructure of metals and alloys, a properly prepared sample surface becomes the window into understanding material properties and performance characteristics.
Purpose of polishing in sample preparation
The objective of metallographic polishing is to produce a flat, deformation-free surface that is representative of the actual microstructure of the material. In my experience in materials testing, I have discovered that improper sample preparation causes misunderstanding of important material characteristics. Polishing eliminates surface irregularities and fabrication artifacts while reducing introduced deformation.
A well-polished specimen enables:
- Clear observation of grain boundaries, phases, and inclusions
- Accurate quantification of microstructural features
- Reliable hardness testing results
- Effective etching for phase contrast
Furthermore, proper polishing eliminates scratches and surface damage that could otherwise obscure important microstructural features or create misleading artifacts. The quality of polishing directly influences the accuracy of subsequent analysis techniques including optical microscopy, electron microscopy, and microhardness testing.
Fundamentals of Material Removal
| Mechanism | Key Drivers | Typical Media | Notes |
| Mechanical abrasion | Hard particle scratching | Diamond, alumina | Dominant in coarse & intermediate polishing |
| Chemico-mechanical (CMP) | Synergistic chemical softening + gentle abrasion | Colloidal silica, oxide suspensions | Promotes ultra-low deformation; ideal for EBSD |
| Electropolishing | Anodic dissolution in electrolyte | Phosphoric–sulfuric mixes | Stress-free finish on difficult alloys |
Rule of Thumb: Each polishing step should eliminate ~3 × the deformation depth of the previous step.
Stages: Grinding, Intermediate, Final Polishing
Polishing in metallographic work includes three different but related stages of progressively finishing the specimen surface:
- Grinding Stage: This first step eliminates gross surface irregularities and creates a flat reference plane. I usually begin with coarse silicon carbide (SiC) papers (120-180 grit) and proceed progressively through finer grits (320, 400, 600, 800, 1000, 1200). Each grinding step in succession eliminates the scratches from the previous step and introduces finer scratches.
- Intermediate Polishing: This critical transitional phase removes the fine scratches left by grinding. Diamond suspensions or pastes (typically 9μm, 6μm, and 3μm) paired with appropriate polishing cloths work effectively here. The harder the material, the longer this stage usually takes.
- Final Polishing: This phase produces the mirror-like surface finish needed for microscopic analysis. Colloidal silica (0.05-0.04μm) or alumina suspensions (0.3-0.05μm) on soft nap cloths eliminate the last scratches. Final polishing can include light chemical etching action for some materials.
Advancing from one step to another requires progressively lighter pressure and finer abrasive particles. Each step, therefore, removes the damage created by the previous step and produces progressively finer surface structures.
Mirror finish vs. functional finish
In designing a metallographic preparation flow, I need to determine if a mirror finish or functional finish is most suitable to meet the analytical goals:
Mirror finish provides a scratch-free, highly reflective surface perfect for:
- High-magnification optical microscopy
- Electron microscopy analysis
- Microhardness testing
- Materials containing sensitive microstructural features
Functional finish prioritizes sustaining certain things at the cost of best reflectivity:
- Retains edge retention in composite materials
- Maintains inclusions in cast metals
- Preserves phase boundaries in multi-phase alloys
- Saves preparation time for routine quality control
The difference is especially important for materials that have large differences in hardness between phases. Softer phases can erode more rapidly than harder phases during polishing, producing relief that can cause difficulties with focus in microscopy. That same relief, though, may assist in identifying some features in some uses.
The specific workflow employed depends on the material’s properties and the intended analysis. For instance, titanium alloys require specialized polishing techniques to prevent smearing, while cast irons need methods that preserve graphite flakes.
Step-by-Step Polishing Process for Mirror Finish
Polishing to a perfect mirror finish takes careful attention to every stage of polishing. Over the years of doing metallography, I have developed this process into a reproducible technique that always achieves outstanding results. Follow along with the precise steps that yield exam-ready specimens.
Initial planar grinding using SiC abrasive paper
The cornerstone of good metallographic preparation is correct planar grinding. First, I clamp the mounted sample into a holder and begin with coarse abrasive paper—usually 120 or 180 grit SiC—to create a flat reference surface. This operation eliminates cutting marks, deformation, and sample irregularities.
For optimal results, I follow this grinding sequence:
- Begin with 120/180 grit (P120/P180) for 30-60 seconds
- Proceed to 240 grit (P280) for 30-45 seconds
- Continue with 320 grit (P400) for 30-45 seconds
- Go to 400 grit (P800) for 30 seconds
- Finish with 600 grit (P1200) for 30 seconds
Throughout this stage, I maintain moderate pressure (25-30N) and a disk speed of 250-300 RPM. Rotating the sample 90° between each grit ensures uniform material removal. Indeed, water serves as the ideal lubricant during grinding, effectively carrying away debris while preventing overheating.
Intermediate polishing with diamond suspensions
Following planar grinding, intermediate polishing with diamond suspensions removes fine scratches without sacrificing flatness. I start with a hard polishing cloth along with 9μm diamond suspension.
Specifically, my parameters include:
- 9μm diamond suspension: 5-7 minutes at 150 RPM and 25N force
- 6μm diamond suspension: 4-6 minutes at 150 RPM and 20N pressure
- 3μm diamond suspension: 3-5 minutes at 150 RPM and 15N force
It is necessary to maintain correct diamond suspension delivery—I set the drip rate at approximately one drop in 5-10 seconds. Additionally, I make use of contra-rotation (sample holder and cloth rotate in opposite directions) for more aggressive material removal or complementary rotation for more delicate materials.
Final polishing using colloidal silica
The last polishing step is the most critical part of achieving a true mirror finish. I select a soft, nap-type polish cloth (Collo polishing cloth) charged with 0.05μm colloidal silica suspension. This provides both mechanical polishing and mild chemical etching.
For the best outcomes, I decrease both pressure (10-15N) and speed (120-150 RPM) from the previous stages. In addition, I keep the lubrication slightly higher than in diamond polishing stages. Final polishing usually takes 2-5 minutes, based on the hardness and microstructure of the material.
For extremely challenging material:
- Softer alloys benefit from shorter polishing times to prevent relief
- Harder materials may require extended polishing with periodic cloth cleaning
- Multi-phase materials may require adjusted suspension pH levels
Cleaning between stages to prevent contamination
Cross-contamination between polishing steps can invalidate even the most thorough preparation work. I follow a strict cleaning regimen between each step:
First, I wash the specimen with warm running water while wiping gently with cotton. Next, I spray with lab-grade ethanol and dry using clean filtered compressed air. In the case of materials that are likely to oxidize, I use isopropyl alcohol in place of ethanol.
Also, I wash the sample holder and fixturing parts in between stages. I ultrasonically clean specimens in distilled water with several drops of detergent for 2-3 minutes, followed by an alcohol rinse, before final polishing.
At every step along the way, I touch specimens only at their edges or by mounting material, avoiding contact with the polished surface. Finally, this systematic cleaning technique guarantees that abrasive particles from earlier steps do not degrade the final surface quality.
Choosing the Right Polishing Equipment and Consumables
Choosing the right equipment and consumables greatly affects metallographic polishing results. Over my time in the lab, I’ve learned that equipment decisions directly impact sample quality, preparation time, and analytical precision.
Manual and automatic metallographic polishing machines
The choice between manual and automatic polishing systems is based mainly on throughput demands, budget, and consistency of results requirements.
Manual polishing machines provide:
- Less initial investment
- Simplicity in maintenance and operation
- Greater operator control for challenging specimens
- Smaller footprint in laboratory settings
Conversely, automated systems provide:
- Exceptional reproducibility with programmable parameters
- Increased throughput for several specimens
- Less operator fatigue and variability
- Consistent force application during the polishing cycle
I’ve discovered that semi-automated systems are a great compromise for most labs. These devices enable manual specimen placement but automate important parameters such as force, speed, and cycle time. For laboratories that process over 20 samples per week, the cost of automation is generally recovered within 18 months in the form of enhanced efficiency and less rework.
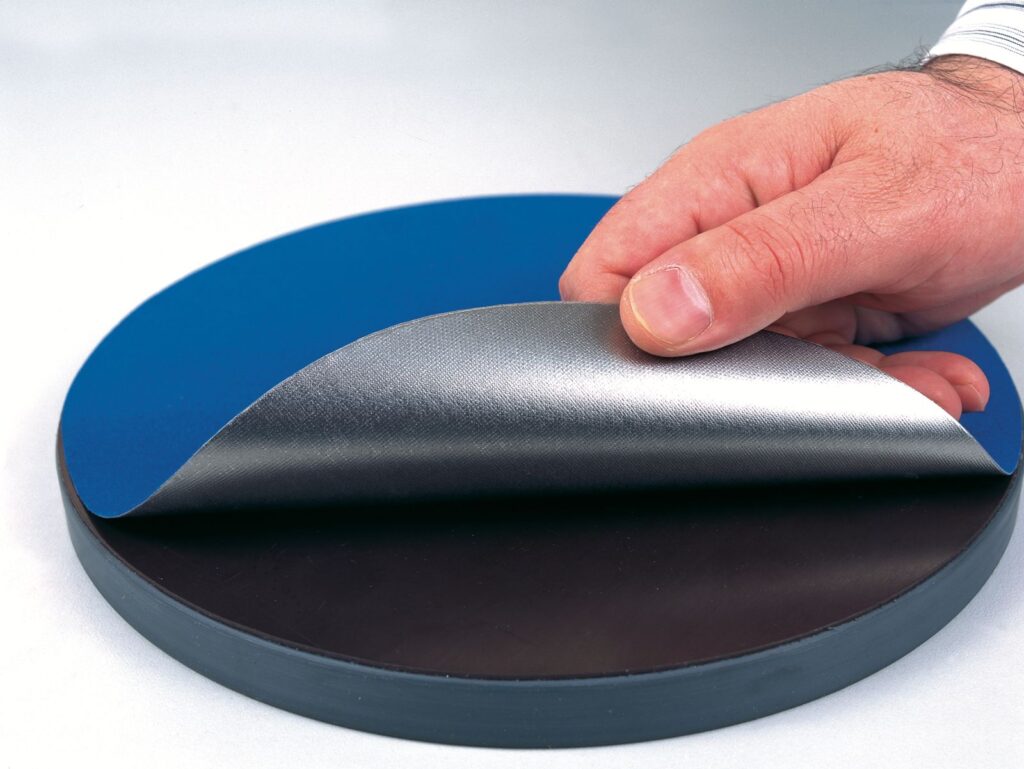
Polishing cloths vs. polishing pads: When to use each
The distinction between polishing cloths and pads is extremely critical but always overlooked. Essentially, the microstructural features and hardness of your material must dictate this choice.
For intermediate polishing steps, I suggest:
- Hard polishing cloths (nylon, polyester): Ideal for maintaining the flatness of hard materials like tool steels and ceramics.
- Medium-hard cloths (synthetic silk, silk): Suitable for general applications and multi-phase materials
- Polishing pads (polyurethane): Excellent for composite materials and prevention of grain pullout
For final polishing, nap cloths produced from natural fibers such as Wool or synthetic velvet give the most satisfactory results for the majority of materials. However, chemically resistant pads become essential when employing aggressive final polishing suspensions, especially with reactive metals such as titanium or zirconium.
The pile height of the cloth has a direct effect on edge retention—lower pile retains edges and boundaries, but higher pile gives better surface finish at the cost of edge definition. When doing precision work on heat-treated samples, I keep a minimum of two sets of cloths to avoid cross-contamination between material families.
Diamond vs. alumina abrasives: Material compatibility
Abrasive choice inherently influences both polishing effectiveness and ultimate surface quality. Diamond suspensions are superior for:
- Materials with hardness >45 HRC
- Multiphase alloys having large hardness variations
- Applications requiring exceptional flatness
Alumina suspensions are more appropriate for:
- Soft nonferrous alloys (copper, aluminum)
- Embedment-prone materials (lead, tin)
- Final polishing stages where chemical interaction is desired
As well as this mechanical action, colloidal silica also has a chemical polishing action and is thus very good for final polishing of stainless steels, nickel alloys, and titanium. The pH of such suspensions can be adjusted to optimize the chemical action for a particular material.
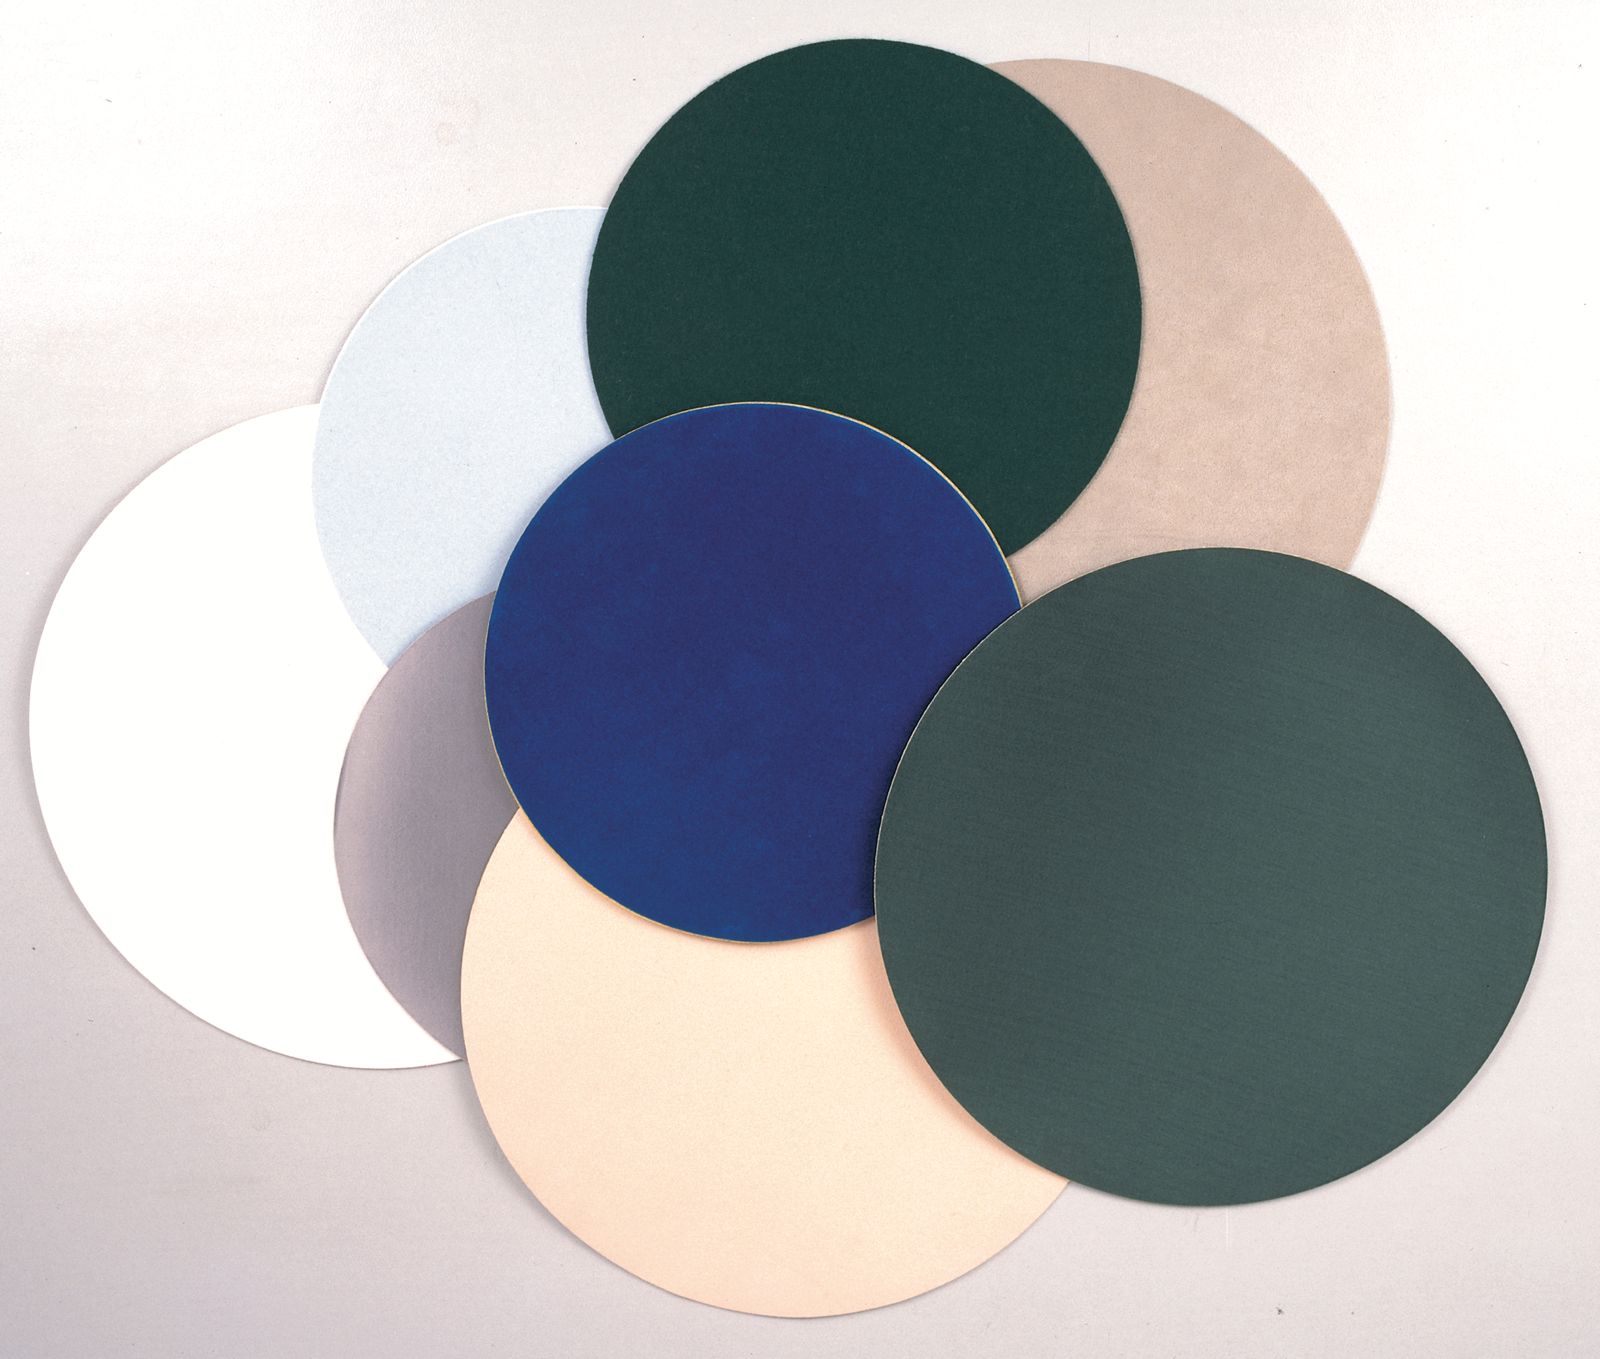
Metallographic polishing disks and their grit chart
Understanding abrasive disk specifications ensures proper progression through preparation stages. SiC paper designations follow either FEPA (P-grade) or ANSI/CAMI standards:
| FEPA (P-grade) | ANSI/CAMI | Average Particle Size (μm) | Typical Application |
| P120 | 120 | 125 | Initial planarization |
| P220 | 220 | 68 | Coarse grinding |
| P320 | 280 | 46.2 | Intermediate grinding |
| P500 | 360 | 30.2 | Fine grinding |
| P800 | 400 | 21.8 | Fine grinding |
| P1200 | 600 | 15.3 | Final grinding |
| P2500 | 1200 | 8.4 | Pre-polishing |
For diamond abrasives, the particle size is directly equivalent to microns (9μm, 6μm, 3μm, 1μm). In spite of the advertising hype, I always confirm real particle size distributions instead of depending on nominal designations alone since manufacturing tolerances can differ extensively among suppliers.
Bonded abrasive disks with diamond or cubic boron nitride (CBN) inclusions provide longer life and more reproducible results than the standard SiC papers for regular preparations at increased initial cost.
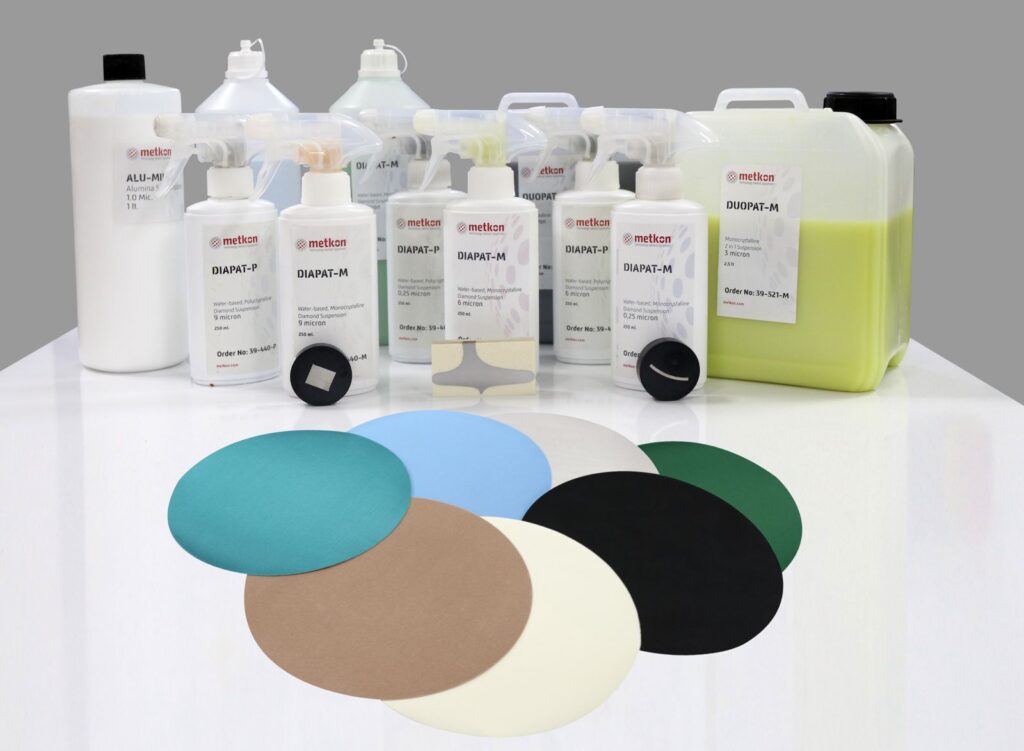
Consumable Selection
Abrasives
| Abrasive | Particle-Size Range | Best For | Comments |
| Diamond (monocrystalline) | 9 → 0.25 µm | Hard steels, carbides | Fast cut, sharp facets |
| Polycrystalline diamond | 9 → 1 µm | Tough superalloys | More cutting edges → less subsurface damage |
| Alumina (Al₂O₃) | 1 → 0.3 µm | Aluminum, copper, Zn | Aggressive yet economical |
| Colloidal silica (SiO₂, pH ≈ 10) | 50 nm | Final CMP step | Forms amorphous gel layer; removes comet tails |
Cloths & Pads
| Cloth Type | Hardness | Typical Use | Example Alloys |
| Rigid (METAPO-P) | Hard | 9 – 6 µm diamond | Carbides, ceramics |
| Medium (METAPO-B, METAPO-V) | Semi-hard | 6 – 1 µm diamond | Steels, Ni-based |
| Napped (FEDO-3, FEDO-1S) | Soft | ≤ 1 µm diamond or alumina | Soft metals, composites |
| Chemo-mechanical (COLLO) | Very soft | Colloidal silica | EBSD prep, superalloys |
Metkon classifies its polishing cloths as woven (METAPO, WOOL) for hard, flat pre-polishing; non-woven for very hard materials; flocked (FEDO) for super-polished finishes; and chemo-textile (COLLO) for CMP applications.
Optimizing Polishing Parameters for Scratch-Free Surfaces
The precise control of polishing parameters often marks the difference between mediocre and exceptional metallographic specimens. In my extensive testing across various material types, I’ve discovered that achieving scratch-free surfaces requires not just quality equipment but also meticulously calibrated operational parameters.
Recommended RPM and load for each polishing stage
Rotational speed and pressure applied essentially control material removal rates and surface finish. In general, I use the following guidelines as a function of material hardness:
| Polishing Stage | Soft Materials (<35 HRC) | Medium Materials (35-45 HRC) | Hard Materials (>45 HRC) |
| Grinding | 200-250 RPM, 20-25N | 250-300 RPM, 25-30N | 300-350 RPM, 30-35N |
| Intermediate | 120-150 RPM, 15-20N | 150-180 RPM, 20-25N | 180-200 RPM, 25-30N |
| Final | 100-120 RPM, 10-12N | 120-150 RPM, 12-15N | 150-180 RPM, 15-20N |
In fact, I have found that high RPM generates too much heat that will change the surface structure of the material, especially heat-sensitive alloys. In titanium and titanium alloys, I reduce RPM by approximately 20% from the standard recommendations to prevent smearing.
Lubricant flow rate and its impact on surface quality
Adequate lubrication is still crucial but often overlooked in metallographic polishing. The lubricant performs three significant functions: it maintains the specimen cool, carries abrasive particles, and expels debris.
For water lubricants, I maintain between 4-6 drops per minute during grinding down to 2-3 drops per minute during intermediate polishing. Oil lubricants require slower flow rates—typically 1-2 drops per minute—as they provide diamond particles with better suspension.
Improper lubrication leads to:
- Heat buildup causing microstructural alterations
- Abrasive particle agglomeration creating deep scratches
- Poor debris removal resulting in surface contamination
Most importantly, consistency of lubricant delivery has a great influence on ultimate surface quality. Thus, I suggest using automated dispensing systems wherever possible to ensure accurate flow rates over the complete polishing cycle.
Time duration per stage: Avoiding over-polishing
The optimal polishing time varies widely with material type and specimen size. Instead of following set times, I monitor visual indications and inspect surface quality at intervals using a microscope.
For plane grinding, 45-60 seconds per paper grade is usually sufficient. Intermediate polishing with diamond suspensions is 3-5 minutes per stage for most engineering alloys. Final polishing typically needs only 1-3 minutes for optimum results.
Signs of over-polishing include:
- Edge rounding becoming pronounced
- Relief forming between stages of varying hardness
- Etching effects appearing before chemical etchants are applied
- Increasing occurrence of artifacts like comet tails
Edge-rounding prevention through parameter control
Edge preservation remains particularly challenging in metallographic preparation. To maintain sharp edges, I precisely control several key parameters simultaneously.
First, I decrease pressure and RPM by 15-20% when polishing specimens that need superb edge retention. Second, I use harder polishing cloths with less conformability around edges. Third, I use complementary rotation (sample and platen rotating in the same direction) instead of contra-rotation for final polishing steps.
For mounted samples, maintaining a minimum of 3-5mm mounting material beyond the specimen edge provides mechanical support that dramatically improves edge retention. Furthermore, reducing polishing time in the final stages often preserves edges while still achieving adequate surface finish for most analytical purposes.
Standard Four-Step Polishing Workflow (Ferrous Alloys)
- Coarse Polish — 9 µm poly diamond on METAPO-P
25 N/specimen, 150 rpm (platen), 60 rpm (head), 2 min. - Intermediate Polish — 3 µm mono diamond on METAPO-B
22 N, 150/60 rpm, 2 min. - Fine Polish — 1 µm mono diamond on FEDO-3
18 N, 120/60 rpm, 1.5 min. - Final CMP — 0.05 µm colloidal silica on COLLO cloth
12 N, 120/0 rpm (central force), 60 – 90 s; rinse thoroughly.
Specialized Techniques
- Vibratory Polishing (8 – 14 kHz): Produces deformation-free surfaces for TEM or EBSD; run 30 min to several hours with 0.05 µm silica.
- Oxide Polishing Suspensions: Magnesia (MgO) for alumina ceramics; chromic oxide for Ni-based alloys.
- Low-Force Polishing: < 10 N per specimen to avoid pull-out in porous sintered materials.
Troubleshooting Common Polishing Defects
Even experienced metallographers are faced with surface imperfections which can invalidate analysis results. In my professional life, determining the underlying causes of such imperfections has been essential for reproducible, high-quality specimen preparation.
Pull-outs: Causes and how to prevent them
Pull-outs occur when particles or phases are pulled from the specimen surface while polishing, creating undesired pits. Hard particles in soft matrices or brittle phases are most susceptible normally.
To effectively prevent pull-outs:
- Choose mounting media of the same hardness as the specimen
- Decrease polishing pressure by 15-20% from normal recommendations
- Reduce polishing times at each step
- Use more viscous lubricants that provide cushioning
For composite materials, I’ve found that infiltrating the specimen with low-viscosity epoxy resin before mounting significantly reduces pull-out incidence. Similarly, decreasing the RPM during intermediate polishing stages averts particle breakdown.
Relief and smearing in soft materials
Relief is obtained when softer phases erode faster than harder phases, creating a non-planar surface. Smearing occurs when ductile materials deform plastically rather than being removed cleanly.
Relief prevention includes the use of polishing cloths that are less napped and harder. In the same way, reduction of pressure and time for final steps of polishing minimizes height differences between stages. In aluminum alloys, cooling the specimen to 10-15°C before final polishing decreases smearing tendencies considerably.
Attack polishing for smeared materials first—5-10% hydrogen peroxide mixed with colloidal silica gives a mild chemical action that will dissolve the smeared layer. Then, give sufficient cooling of the specimen during the process.
Scratches after final polish: Root causes
Repeated scratches after final polishing are most often caused by four predominant reasons: inadequate progression through abrasive sizes, contamination from previous operations, embedded abrasives, or improper cloth selection.
Notably, what is seemingly fine scratches can be twins or slip bands in some materials. Observe scratches under polarized light—if they vanish, they are probably microstructural features and not preparation artifacts.
To remove stubborn scratches, ultrasonic cleaning between stages is essential. Also, storing polishing cloths in sealed containers prevents environmental contamination that introduces unwanted scratches.
Contamination and embedded particles
Contamination appears as foreign material on or below the specimen surface. Hard particles from earlier preparation steps are often embedded in softer materials, causing comet-tail scratches in later polishing.
To fight contamination, use a strict cleaning regimen comprising ultrasonic cleaning in detergent solution followed by alcohol rinse. Just as important, use different cloths for various material families to avert cross-contamination.
Troubleshooting edge rounding in mounted samples
Edge rounding compromises precise microstructural analysis along specimen edges. In addition to the parameter modifications discussed above, a number of mounting methods can maintain edge integrity.
As a consequence, double mounting is great for edge retention—first mount the sample in hard resin, then remount in a larger mold using softer resin. This forms a supporting hard shell around sensitive edges while still allowing overall workability.
Special edge retention compounds that include alumina or silicon carbide particles can be incorporated into mounting media, physically supporting edges during preparation. Additionally, cold mounting tends to preserve edges better than hot mounting for materials that are heat-sensitive.
Troubleshooting Guide
| Artifact | Probable Cause | Corrective Action |
| Comet tails (radial streaks) | Inadequate final CMP, high head speed | Extend COLLO step; lower head rpm or use static mode |
| Orange peel (waviness) | Soft alloy + hard cloth | Switch to FEDO-1S; reduce force |
| Pull-out of hard particles | Excessive mechanical action | Lower load; use poly diamond; finish with CMP |
| Edge rounding (loss of corners) | Overly soft cloth at high rpm | Use METAPO-P; apply specimen-support ring |
| Scratch carry-over | Poor cleaning between steps | Ultrasonically clean after each stage; use fresh cloth each grit |
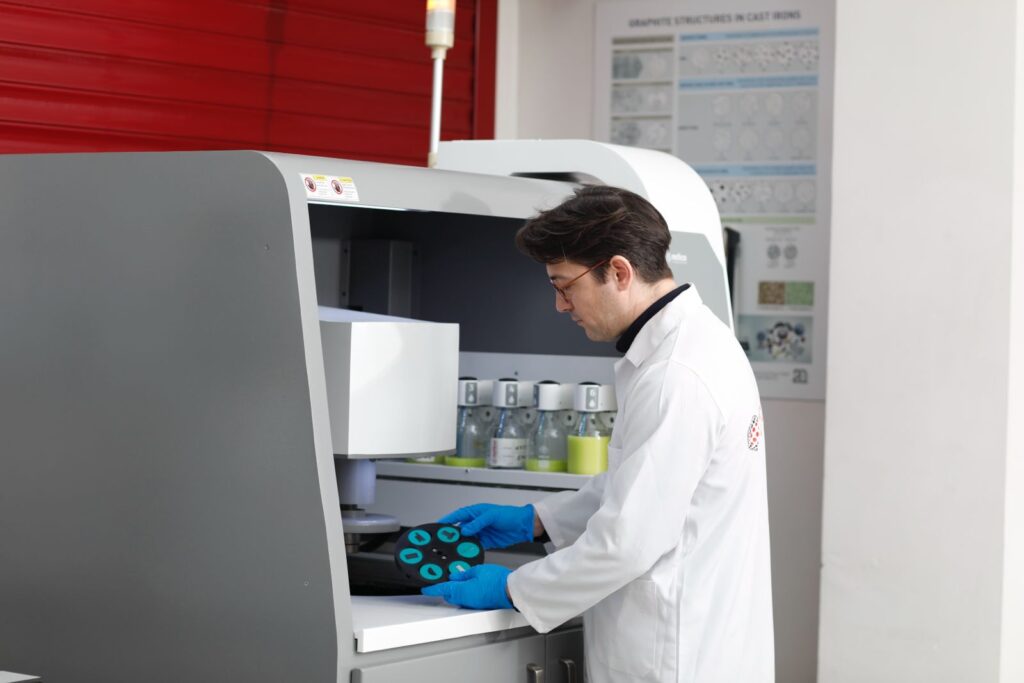
Advanced Tips and Automation in Polishing
Automation technology has converted metallographic preparation from an operator-dependent art to a reproducible science. In labs that handle many samples per day, automated systems deliver consistency that is not possible by hand.
How to automate the metallographic polishing process
Metallographic polishing automation starts with the selection of a system that will suit the laboratory throughput demands. Single-station automated machines suit small laboratories, while multi-station systems suit high-volume laboratories.
To implement automation effectively:
- Start with standardized sample mounting dimensions
- Establish baseline parameters for common material families
- Create comprehensive documentation for each material type
- Incorporate cleaning cycles between preparation stages
For starters, five key variables need to be controlled by automated systems: platen speed, head speed, force, direction, and rate of lubricant delivery. Temperature—a parameter commonly neglected but important for repeatability with heat-sensitive alloys—is also controlled in higher-end machines.
Programmable polishing cycles for repeatability
Programmable recipes form the foundation of metallographic automation. Instead of relying on memory, these digital protocols store exact parameters for each type of material. Most modern systems store 50-100 programs, with multiple stages of preparation per program.
Recipe development has a systematic process:
- Develop parameters manually on representative samples
- Record successful parameters such as time, force, and RPM
- Program these parameters into the machine’s memory
- Validate results by comparison testing
Then, these stored recipes enable new operators to produce expert-level outcomes with minimal training. New recipes must be exhaustively tested on a number of samples until qualified.
Consumable tracking and lifecycle management
Tracking consumable usage extends product life while ensuring reproducible outcomes. Surprisingly, most laboratories neglect the effect of consumable condition on preparation quality.
Electronic tracking systems record:
- Total usage time by consumable
- Number of samples processed per cloth/disk
- Cleaning and maintenance history
- Performance trends over time
Correspondingly, the integration of RFID technology and polishing disks enables automatic recognition and parameter loading. This prevents operator errors such as the use of incorrect consumables for specific phases of preparation.
Integrating polishing with digital imaging workflows
Contemporary metallographic labs are advantaged by linking polishing systems and digital imaging platforms. While appearing to be disparate procedures, integration provides a seamless process from sample preparation through analysis.
In turn, this integration enables:
- Pass-through of sample metadata to imaging systems automatically
- Direct relationship between preparation conditions and image quality
- Statistical examination of preparation efficacy
- Compliance documentation for regulated industries
Notably, the barcode systems facilitate sample tracking from beginning to end of analysis and preparation. Besides increasing efficiency, this electronic record offers defensible documentation for quality assurance.
Health & Environmental Safety
- PPE: Safety glasses, lab coat, nitrile gloves.
- Chemical Handling: Many diamond suspensions contain glycol; avoid skin contact and inhalation.
- Waste Management: Segregate coolant containing colloidal silica; dispose per local regulations.
- Ergonomics: Automatic heads reduce repetitive-strain injuries.
Conclusion
Metallographic polishing is both a science and a technical skill that demands a lot of attention to detail. Throughout this guide, we’ve gone over the whole process, from the initial grinding through the last mirror finishing. Perfecting the process definitely leads to improved microstructural analysis as well as more reproducible material characterization results.
The step-by-step refinement through progressively finer abrasives constitutes the hallmark of successful metallographic preparation. The sequence from coarse SiC papers through diamond suspensions to colloidal silica or alumina suspensions forms the basis for developing true material microstructures. The systematic procedure removes introduced artifacts without destroying essential features.
Parameter control indeed is what divides mediocre and outstanding results. RPM, pressure, lubricant flow, and polishing time need to be coordinated with certain material characteristics. The softer alloys need softer conditions, and the harder ones are helped by higher pressure and extended polishing times. With experience, these settings become second nature but need to be documented painstakingly until that time.
Typical faults like pull-outs, relief, scratches, and edge rounding can compromise otherwise impeccable preparation. Thus, knowing their underlying causes allows prevention instead of troubleshooting. Our laboratory experience teaches us that the majority of faults are due to parameter incompatibilities, cross-contamination between steps, or incorrect consumable choice.
Automation has also turned metallographic preparation from an operator-dependent art into a reproducible science. Programmable recipes provide consistency between several specimens and among various operators. Digital integration also provides seamless workflows from sample preparation to analysis, to the advantage of both efficiency and documentation.
Ideal metallographic specimens are crafted with patience, attention to detail, and systematic approach. Mirror-finished samples reveal material truths imperceptible to the unaided eye—grain boundaries, phase distributions, inclusions, and microstructural features that control material performance. In this way, time invested in polishing skill mastery is repaid in the form of enhanced analytical results and increased material insight. Whether for quality control specimen preparation in the routine or for research work of an advanced nature, these fundamental principles remain the keys to metallographic success.
FAQs
Q1. Why is metallographic polishing carried out? Metallographic polishing creates a flat, distortion-free surface that is truly representative of the material’s microstructure. It enables grain boundaries, phases, and inclusions to be clearly visible so that microstructural features can be accurately measured and hardness testing can be faithfully performed.
Q2. What are the main steps in the metallographic polishing process? The three main steps in the process are grinding, intermediate polishing, and final polishing. Grinding removes surface irregularities, intermediate polishing removes fine scratches generated by grinding, and final polishing creates a mirror-like surface for microscopic examination.
Q3. How do I avoid pull-outs when polishing? To avoid pull-outs, choose mounting media of similar hardness to the specimen, decrease polishing pressure, decrease polishing times at each stage, and employ more viscous lubricants. For composite materials, infiltrating the specimen with low-viscosity epoxy resin prior to mounting can greatly minimize pull-out occurrence.
Q4. What are the advantages of automating the process of metallographic polishing? Automation delivers consistency that cannot be attained manually, has programmable recipes for repeatability, allows consumable tracking and life cycle management, and can be integrated into digital imaging workflows. This results in more productive processes and better documentation for quality assurance.
Q5. How do I select between polishing cloths and polishing pads? It is based on the hardness of the material and microstructural characteristics. Hard polishing cloths are best for flatness in hard materials, medium-hard cloths for general use, and polishing pads for composite materials to avoid grain pullout. Nap cloths of natural fibers or synthetic velvet are generally best for final polishing for most materials.
Q6. Can I skip from 9 µm directly to 1 µm diamond to save time? Skipping grits increases risk of retained scratches; only acceptable on very hard, homogeneous materials with strict inspection afterward.
Q7. Why is my stainless-steel sample smearing on final polish? Stainless has a tendency to gall. Use poly diamond, lots of lubricant, and finish on a COLLO cloth or by electropolish.
Q8. How do I prepare specimens for EBSD? Include a ≥ 10-min vibratory or 0.05 µm silica CMP step on COLLO; target ≤ 0.02 µm RMS roughness and eliminate comet tails entirely.


