Metallographic Hot Mounting Secrets: Hot Mounting Methods, Resin Selection & Troubleshooting Tips
Metallographic Hot Mounting Secrets: Hot Mounting Methods, Resin Selection & Troubleshooting Tips
Did you know that over 80% of metallographic analysis errors are due to improper sample mounting? The metallographic hot mounting press remains one of the most significant pieces of equipment in any materials testing laboratory, directly affecting the quality and validity of microstructural examinations.
When we prepare metallographic specimens, mounting well paves the way for all subsequent preparation steps. Hot mounting techniques yield great advantages over cold mounting techniques, especially for metal specimens requiring edge retention and reproducibility. Further, the proper selection of compression mounting resin—be it phenolic, epoxy, or special proprietary formulations—can dramatically impact your final analysis quality. Indeed, most laboratories encounter common mounting problems such as voids, edge rounding, and sample movement that we can easily avoid with the proper technique.
In this in-depth guide, we’ll cover the fundamental to advanced topics of metallographic hot mounting, ranging from general press operation to parameter optimization. New to metallography or wanting to resolve long-standing mounting problems? We’ve put together our top best practices, resin selection guidelines, and handy tips so that you can get consistent, high-quality results from your hot mounting hydraulic press for metallographic samples.
Metallographic Cold Mounting Process: Expert Guide, Resin Selection & Void-Free Techniques
Understanding Metallographic Hot Mounting
Hot mounting is a basic operation in metallographic sample preparation that has a direct influence on the quality of microstructure analysis. It is a method of embedding specimens in resin at controlled temperature and pressure to produce standardized mounted samples for further preparation.
Purpose of Hot Mounting in Sample Preparation
Hot mounting fulfills mainly three important functions in metallography. Firstly, it provides a standard size and shape for ease of handling during grinding, polishing, and examination operations. Standard size leads to reproducibility of results and simplified fixturing in automatic machines. Secondly, it offers physical support for weak, brittle, or irregular-shaped specimens that could be damaged during preparation. Thirdly, hot mounting protects important edges and surfaces by the appropriate selection of resin and pressure application during the mounting operation.

Also, correct mounting greatly enhances the flatness of prepared surfaces—a very important consideration for correct microstructural assessment. In the absence of proper mounting, it is virtually impossible to achieve a well-prepared surface, and artifacts result, along with misinterpretation of the actual microstructure of the material.
When to Use Hot vs. Cold Mounting
The choice of hot or cold mounting methods relies on a few parameters of your specimen properties. Hot mounting typically offers better edge retention, hardness matching for metallic samples, and shorter processing time. I would suggest hot mounting for:
- Routine metal specimens with edge retention
- Samples that can resist high temperatures (150-180°C) and pressures (290 psi)
- Large-scale sample preparation where efficiency is important
- Specimens requiring excellent flatness and minimal relief
Meanwhile, cold mounting becomes necessary when dealing with:
- Heat-sensitive materials like polymers or electronic components
- Samples with volatile ingredients that can degrade at mounting temperatures
- Porous samples requiring vacuum impregnation
- Materials that could experience phase changes at hot mounting temperatures
- Large samples surpassing hot mounting press capacity
How to Prepare Metallographic Samples – Complete Step-by-Step Guide (With Expert Tips)
Overview of Hot Mounting Press Types
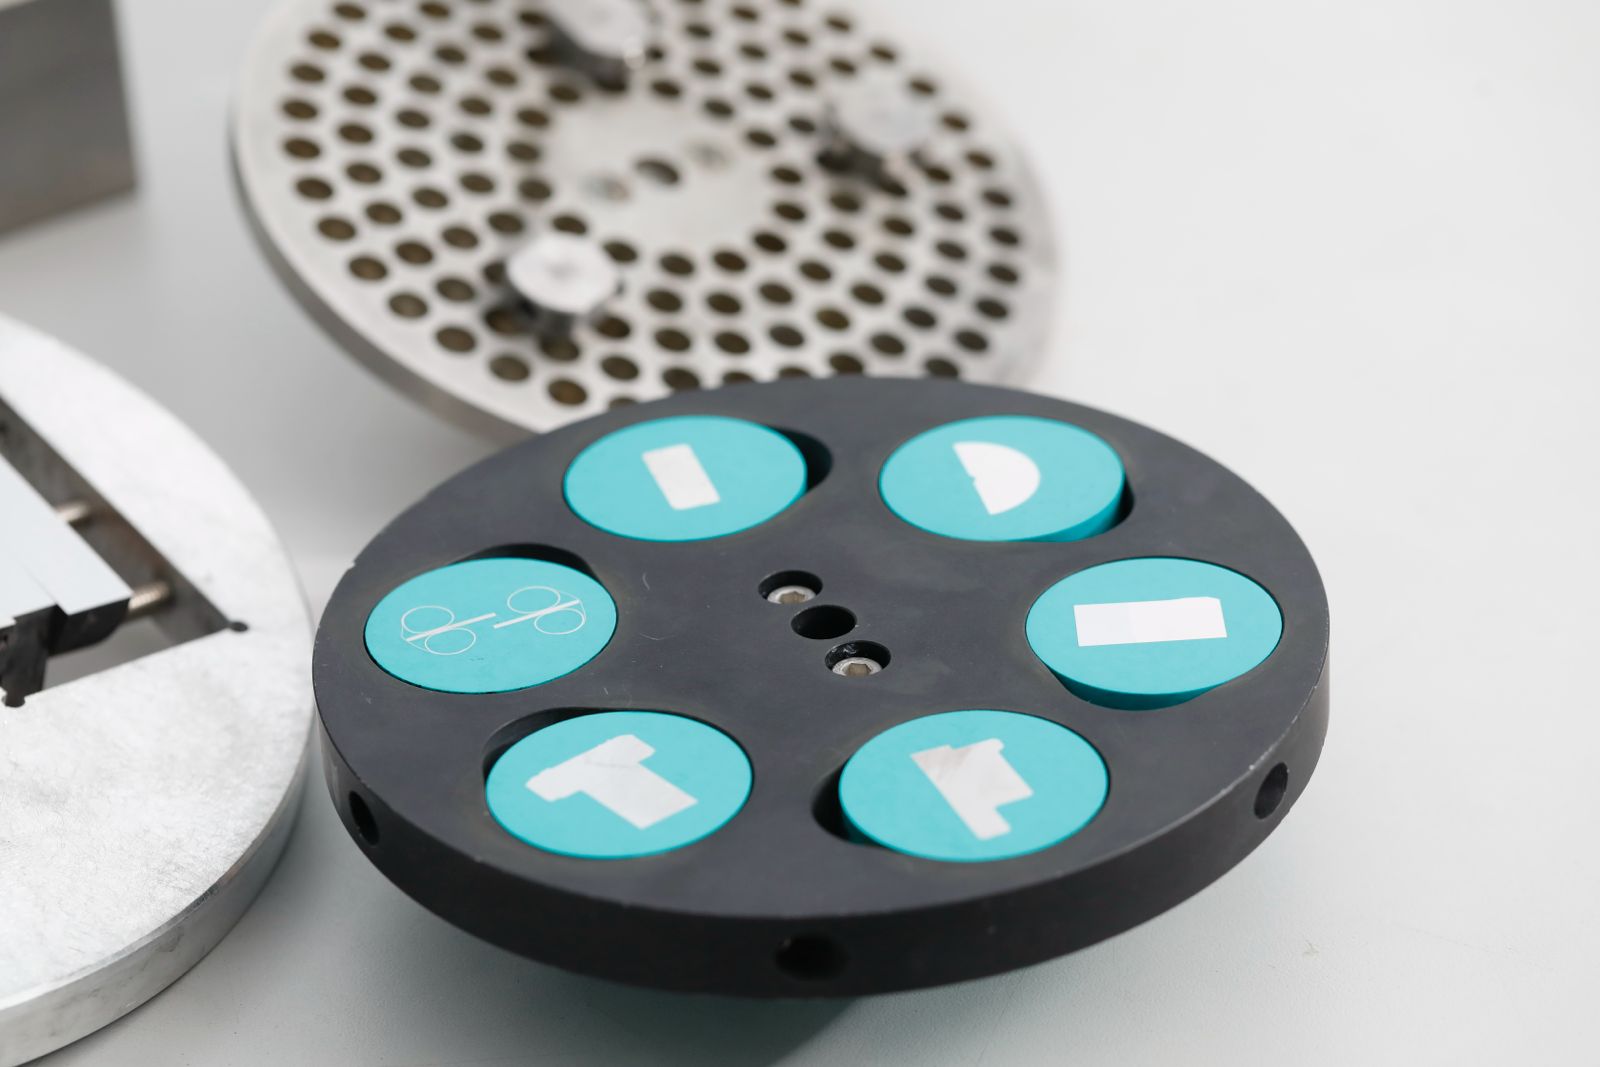
Contemporary metallographic labs make use of a number of hot mounting presses:
- Manual Hydraulic Presses – Basic equipment that needs operator management of heating, cooling, and pressure settings. These presses are low in cost but require greater operator attention and expertise.
- Semi-automatic Presses – Possess programmable temperature and pressure cycles but are loaded and unloaded manually. They represent a compromise between automation and cost.
- Fully Automatic Presses – Feature programmable mounting cycles, auto cooling systems, and in some cases, multiple mounting positions for higher throughput. These are the most efficient choice for high-volume labs.
The most important elements of any hot mounting press are the heating element, cooling system, hydraulic pressure system, and control interface. Newer models now feature touchscreen interfaces, various mold cylinder options, and quick cooling features that effectively cut down cycle times from the standard 20-30 minutes to as low as 5-7 minutes per mount.
Accordingly, choosing the right press type hinges on your lab’s sample volume, technical demands, and financial resources. A simple manual press may be enough for casual mounting demands, while high-volume settings gain a lot from automated systems.
Step-by-Step Hot Mounting Process
The success of metallographic analysis depends on the correct performance of the hot mounting operation, which is carried out in a series of well-defined steps. This is a technique that requires detail and an understanding of how every parameter influences your final specimen quality.
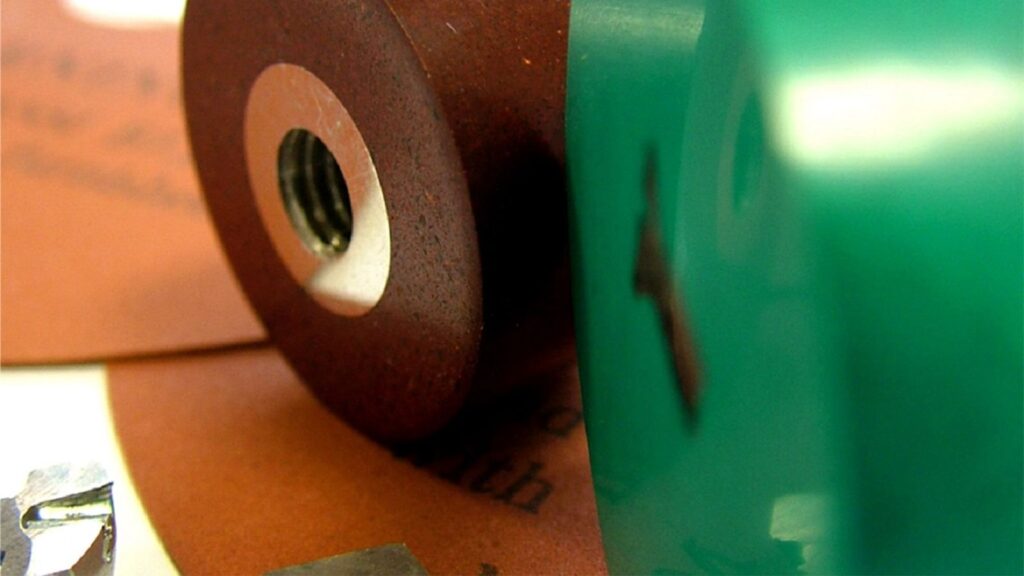
Preparing the Specimen and Mold Cylinder
Good specimen preparation is foremost. I thoroughly clean specimens by ultrasonic cleaning in acetone or alcohol to remove oils, fingerprints, and impurities that can affect adhesion. I then dry the specimen completely—moisture creates voids during mounting.
The mold cylinder also needs to be prepared. Apply a thin film of release agent to avoid sticking first. For cylindrical specimens, I stand them up with the surface of interest facing downwards. Specimens of irregular shape must be specially positioned—orient them to leave the area you want to investigate after polishing exposed. Small or multiple specimens must be well-spaced to avert contacting each other during compression.
Before loading resin, ensure that the upper and lower rams are free from previous mounting cycle residues. This easy step eliminates contamination and enhances mount quality considerably.
Setting Hot Mounting Parameters: Temperature, Pressure, Time
The three important parameters for hot mounting are:
Temperature: Most general-purpose phenolic resins require 150-180°C. Epoxy-based resins typically require 140-160°C. A setting temperature that is too high can harm the resin; too low results in incomplete curing.
Pressure: Normal pressure is between 250-300 psi (17-21 bar). Fragile specimens can be processed at lower pressure (200 psi) to avoid deformation, while dense resins may require higher pressure.
Time: Heating time is typically 5-10 minutes, depending on the resin type and mold size. Larger molds require additional time for the heat to soak through consistently. Cooling time varies with the cooling method but typically takes 3-8 minutes.
Parameter optimization depends on specific resins—always consult the manufacturer’s recommendations for your specific mounting media.
Compression Mounting Cycle Explained
The entire mounting cycle is composed of four different phases:
- Heating Stage – Following specimen and resin placement, the press closes under initial pressure and begins heating. The resin transforms from powder to liquid state while achieving the melting point.
- Compression Phase – While the resin is softening, the press continues to apply constant pressure for the resin to flow around the specimen, removing air gaps.
- Curing Phase – The temperature holds steady while the resin undergoes polymerization. Thermosetting resins form permanent molecular bonds during this critical phase.
- Cooling Phase – After complete polymerization, the temperature decreases while maintaining pressure. This prevents warping and ensures dimensional stability of the finished mount.
Monitoring of the pressure gage during the cycle identifies developing issues—sudden pressure drops can indicate leakage or partial filling.
What is the Vickers Hardness Test? | Method, Applications &Advantages
Rapid Cooling vs. Air Cooling Methods
The choice of cooling directly affects productivity and mount quality. Contemporary metallographic presses provide two general cooling methods:
Rapid Cooling utilizes water circulation through cooling channels in the mounting press. This method dramatically reduces cycle time—from 15 minutes to about 5-7 minutes per mount. Rapid cooling, however, can introduce internal stresses into certain resins, which can affect edge retention.
Air Cooling permits the mount to cool naturally but at a controlled rate. While slower (usually 10-15 minutes), mounts have lower internal stress and frequently better edge retention. For critical studies where edge preservation is of the utmost importance, air cooling is still the method of choice.
For an optimum compromise between efficiency without loss of quality, I recommend a hybrid approach—pre-water cooling followed by a short air cooling period—that balances cycle time versus mount quality.
Choosing the Right Hot Mounting Resin
The selection of the proper resin for hot mounting is as critical as the regulation of the mounting parameters themselves. Your selection of the resin directly influences edge retention, clarity, hardness, and ultimately, the quality of your metallographic examination.
Phenolic Resins: Cost-Effective and Fast
Phenolic resins are still the benchmark for general metallographic practice largely because of their superior balance of properties and cost. These thermosets cure fast (5-7 minutes is usual), have good hardness matching for most metals, and last exceptionally well. Black phenolic types have wood flour filler that minimizes shrinkage, while red phenolics have mineral fillers for improved edge retention and increased hardness.
Notably, phenolic resins excel in applications requiring:
- High sample throughput because of quick curing times
- Economic processing of routine metal specimens
- Good electrical conductivity for SEM analysis (carbon-filled grades)
In spite of these benefits, phenolics are opaque and therefore cannot be used when visual observation of the sides of the sample is required.
Epoxy Resins: High Clarity and Edge Retention
Epoxy hot mounting media give a superior edge preservation compared to phenolics and are therefore adequate for examining fine details or brittle materials. They exhibit very good clarity, allowing visual observation of the specimen from any side—particularly useful when positioning is critical.
These resins feature:
- Lower shrinkage rates than phenolics, reducing the risk of sample pull-away
- Enhanced adhesion to most sample materials
- Improved hardness matching of softer and non-ferrous metals
- Good chemical resistance during etching
The primary drawback of epoxy resins comprises their relatively higher cost and slightly slower curing rates, typically 8-12 minutes at temperature.
Thermoplastic vs. Thermosetting Compounds
The basic distinction between these types of resins is how they behave molecularly during the mounting cycle. Thermosetting resins (phenolics, epoxies) experience permanent chemical cross-linking when heated, forming a rigid irreversible structure. They cannot be re-melted or reshaped once cured.
Thermoplastic substances (acrylics, polyethylene), on the other hand, simply soften when heated and harden when cooled without chemical change. This property has unique advantages:
- They can be reheated and reused if needed
- They have lower mounting temperatures (120-150°C)
- They have low shrinkage on cooling
Yet, thermoplastics provide less edge retention and hardness matching compared to their thermosetting counterparts.
Resin Selection Guide Based on Sample Type
Corresponding resin type to specimen type greatly enhances mounting quality:
For ferrous metals and hard alloys, standard phenolics are economical and sufficiently hard for routine analysis.
For non-ferrous metals and precious metal alloys, epoxy resins or mineral-filled phenolics avoid excessive edge rounding when polishing.
For heat-sensitive materials or electronic components, thermoplastic resins that have lower processing temperatures reduce thermal degradation.
For porous materials requiring impregnation, consider specialized epoxy formulations designed for penetration.
For SEM analysis, conductive resins loaded with carbon dispel charging issues and improve image quality.
Ultimately, the optimal resin selection is a compromise between your particular analysis requirements, specimen type, budget, and laboratory throughput requirements.
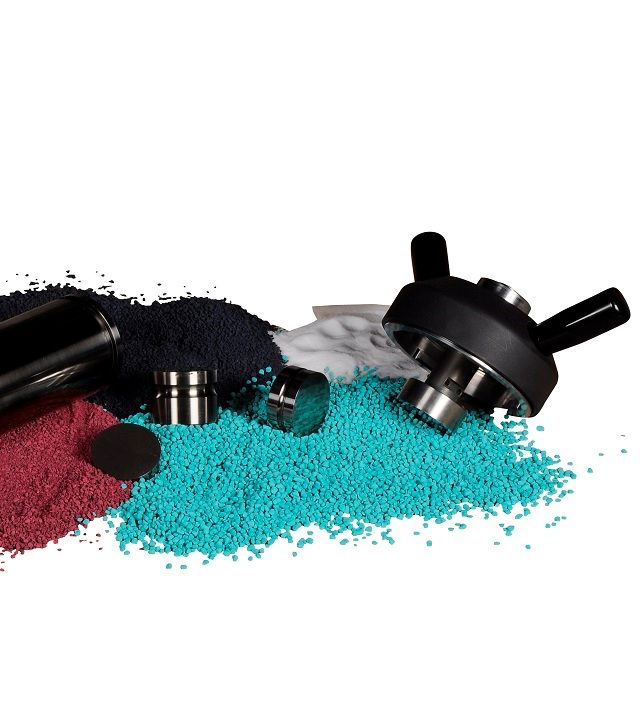
Metkon Hot-Mounting Powders at a Glance
| Metkon Code | Resin Family | Key Feature | Typical Cycle (30 mm puck)* | Best-fit Applications |
| 29-001 Black Phenolic Powder | Phenolic | Cost-effective routine mount | 150 °C • 250 bar • 8 min | Steels, Al-alloys |
| 29-002 Red Phenolic Powder | Phenolic | Red colour for visual sorting | 150 °C • 250 bar • 8 min | QA lines needing colour coding |
| 29-012 Diallylphthalate Powder | Glass-filled phenolic | Extra hardness & edge retention | 160 °C • 250 bar • 10 min | White/grey cast irons, cermets |
| 29-013 Conductive Bakelite Powder | Graphite-filled phenolic | Low resistivity for SEM | 180 °C • 300 bar • 10 min | SEM/EDS on non-conductors |
| 29-011 Epoxy, Hard Powder | Epoxy | Very low shrinkage, high hardness | 170 °C • 300 bar • 12 min | Carbides, hard coatings |
| 29-010 Transparent Acrylic Powder | Acrylic | Clear puck for inclusion checks | 180 °C • 300 bar • 12 min | Clean-steel inclusion rating |
*Start at room temp; cool under pressure to ≤ 60 °C before ejecting.
Avoiding Common Mounting Defects
Despite good equipment and materials, mounting defects can happen if some precautions are not observed. Being aware of common issues and knowing the solutions to them will enable you to produce high-quality, consistent metallographic specimens.
Causes of Voids and How to Prevent Them
Voids—those frustrating air pockets that compromise sample quality—typically result from several factors. Primarily, insufficient resin quantity creates unfilled spaces during compression. I always measure resin carefully, ensuring it fills approximately 2/3 of the mold cylinder height before compression.
Trapped water is another frequent offender. To avoid this problem, dry specimens carefully before mounting and keep resin powders in closed containers. Briefly pre-heating problem specimens to 100°C is a good way to drive off any lingering water.
Rapid compression also contributes to void formation by trapping air. Instead, apply pressure gradually during the initial heating phase, allowing air to escape as the resin softens. Essentially, this creates a natural path for air displacement rather than encapsulating it within the mount.
Edge Rounding and Sample Movement Issues
Edge rounding is the loss of definition of specimen edges during preparation that degrades important microstructural details. It is usually due to hardness mismatch between mounting material and specimen. To reduce this effect, choose resins with hardness close to your specimen material—epoxy-based materials tend to be better for edge retention than phenolics.
Sample movement is a similar challenge that takes place when specimens move during mounting. To avoid this:
- Position specimens at least 3-5mm from the mold edge
- Put flat surfaces on the mold base
- Build up pressure gradually rather than abruptly
- For several specimens, ensure proper spacing to avoid contact
Contamination and Resin Incompatibility
Cross-contamination happens when residue from one mount influences new specimens. Therefore, clean all parts of the press thoroughly between mounts with suitable solvents. Also, dedicate certain mold cylinders to specific types of resin to avert material incompatibility problems.
Resin incompatibility is manifested as poor adhesion, cracking, or discoloration. Certain specimen treatments, especially those involving oils or coatings, can interact with mounting media in an adverse manner. In such cases, pre-cleaning specimens with alcohol or acetone eliminates reactive substances.
Automated Sample Preparation: Cut Operator Impact While Boosting Time & Cost Savings
Mold Cylinder Size and Capacity Considerations
Selecting appropriate mold cylinder dimensions significantly impacts mounting quality. Undersized cylinders create excessive pressure concentration, potentially deforming delicate specimens. Conversely, oversized cylinders may result in insufficient pressure distribution.
Specimen-to-mold wall clearance must not be less than 3mm to avoid edge effects. Similarly, vertical clearance is important—specimens must be at least 5mm below the final mount surface for proper coverage.
For capacity, consider both physical specimen size and pressure distribution needed. Metallographic hot mounting presses most typically offer cylinders ranging from 25mm to 50mm diameter, with the optimum size determined by specimen geometry rather than maximum capacity.
Matching Resin to Material & Imaging Mode
| Specimen Material / Task | Recommended Metkon Powder | Rationale |
| Routine steels & Al parts | 29-001 or 29-002 | Low cost, good abrasion resistance |
| Grey or white cast iron | 29-012 | Glass fill boosts hardness, prevents edge chipping |
| Carbide tools, thermal-spray coatings | 29-011 | Epoxy bonds tightly, minimal shrinkage gaps |
| SEM of ceramics & polymers | 29-013 | Graphite path discharges beam-induced charge |
| Inclusion rating under bright-field | 29-010 | Transparency allows light through edges |
Advanced Tips for Better Mounting Results
Aside from simple mounting procedures, a variety of sophisticated methods can significantly enhance your metallographic sample quality. To begin with, veteran metallographers utilize these advanced techniques to increase efficiency and accuracy.
Using Double-Sample Molds for Efficiency
Double-sample molds mount two specimens simultaneously, cutting down on preparation time nearly in half. Position specimens on both sides of the mold cylinder, at a minimum of 5mm apart to prevent interaction. This works best with specimens of equal hardness that require equal mounting parameters.
Automatic vs. Manual Hot Mounting Presses
Automatic presses offer improved control over parameters with programmable cycles that eliminate human variability. Manual presses, on the other hand, offer greater flexibility for unusual specimens but require operator expertise. For laboratories handling more than 15-20 samples a day, automatic presses justify their higher upfront expense in terms of quality consistency and reduced labor costs.
Optimizing Parameters for Different Materials
Optimize mounting parameters according to individual material characteristics:
- Brittle ceramics: Reduce pressure to 200 psi; lengthen cooling time
- Heat-sensitive alloys: Reduce temperature to 140°C; extend cycle time
- Porous specimens: Gradually apply pressure; prolong heating stage
Routine Maintenance of Metallographic Mounting Press
Regular monthly maintenance avoids expensive downtime and promotes consistent results. Wipe ram surfaces clean with acetone after every use. Further, inspect hydraulic systems regularly for leaks, heating elements for even temperature distribution, and calibrate pressure gages every year. Next, record all maintenance tasks to monitor press performance over time.
Conclusion
Mastering metallographic hot mounting is a key skill in ensuring accurate microstructural analysis results. In this guide, we went through key areas from fundamental press operation to expert-level parameter optimization. Good mounting sets the stage for all other preparation steps, having a direct impact on final analysis quality.
Hot mounting provides ample benefits over cold mounting methods, especially for metal samples that need edge preservation. The choice of phenolic, epoxy, or special formulations greatly affects your outcome. Furthermore, management of temperature, pressure, and time settings guarantees the best specimen quality.
Mounting defects like voids, edge rounding, and sample movement are easily prevented with good technique. Knowing the reasons behind these problems, you can take preventative action before they ruin your analysis. Clearly, attention to detail in specimen preparation is rewarded at later stages of examination.
Your resin selection must align with specific sample characteristics—ferrous metals typically work well with standard phenolics, while non-ferrous specimens often require epoxy resins for superior edge preservation. Therefore, considering your specific analytical requirements remains essential when selecting mounting media.
Routine maintenance of your hot mounting press ensures reproducible results and avoids costly downtime. Whether you’re operating a manual or automatic press, regular inspection and cleaning extend equipment life while maintaining mounting quality.
The distinction between poor and excellent metallographic analysis can often be traced back to correct mounting practice. With the information in this guide in hand, you can now tackle metallographic hot mounting with assurance that you have the know-how to produce consistent high-quality results in your important material analyses.
FAQs
Q1. What are the primary benefits of hot mounting in metallography? Hot mounting offers edge retention, better hardness matching with metallic samples, and shorter processing times than cold mounting. It’s suitable for standard metallic specimens and high-volume sample preparation.
Q2. How do I select the correct resin for hot mounting? Select resins according to your specimen type. Utilize phenolic resins for standard metallic specimens and budget-friendly processing. Use epoxy resins for excellent edge preservation and clarity, with a preference for non-ferrous metals and fragile materials.
Q3. Why do voids form in mounted specimens, and how do I avoid them? Voids are usually due to too little resin, moisture trapped in the specimen, or too quick compression. Avoid them by accurately measuring resin, drying specimens completely, and adding pressure slowly in the first heating stage.
Q4. How do I optimize hot mounting parameters for a variety of materials? Vary parameters according to material characteristics. For brittle ceramics, decrease pressure and lengthen cooling time. For heat-sensitive alloys, decrease temperature and lengthen cycle time. For porous specimens, increase pressure slowly and lengthen the heating stage.
Q5. What upkeep is necessary on a metallographic hot mounting press? Conduct monthly upkeep by wiping ram surfaces clean with acetone after every use, visually examining hydraulic systems for leaks, verifying heating elements for uniform heat distribution, and calibrating pressure gages every year. Record all upkeep procedures to monitor press performance over time.
Q6. Is it possible to mount several small specimens in a single puck? Yes—space ≥ 2 mm apart to prevent cross-grinding scratches and achieve complete resin flow between pieces.
Q7. Is hot mounting appropriate for solder joints? Only if the solder alloy’s melting temperature is above the press temperature; otherwise, choose room-temperature epoxy.
Q8. How do I avoid charging conductive mounts in SEM? Use graphite-filled compounds (<10 Ω cm resistivity) and ground the specimen holder with conductive paint bridging puck edge to stub.


